Channels with Store Auth
This guide walks you through setting up a channel in Konnect when the channel requires Store-level Authentication. With Store Auth, each store or location requires its own credentials to connect, ensuring secure and distinct configurations.
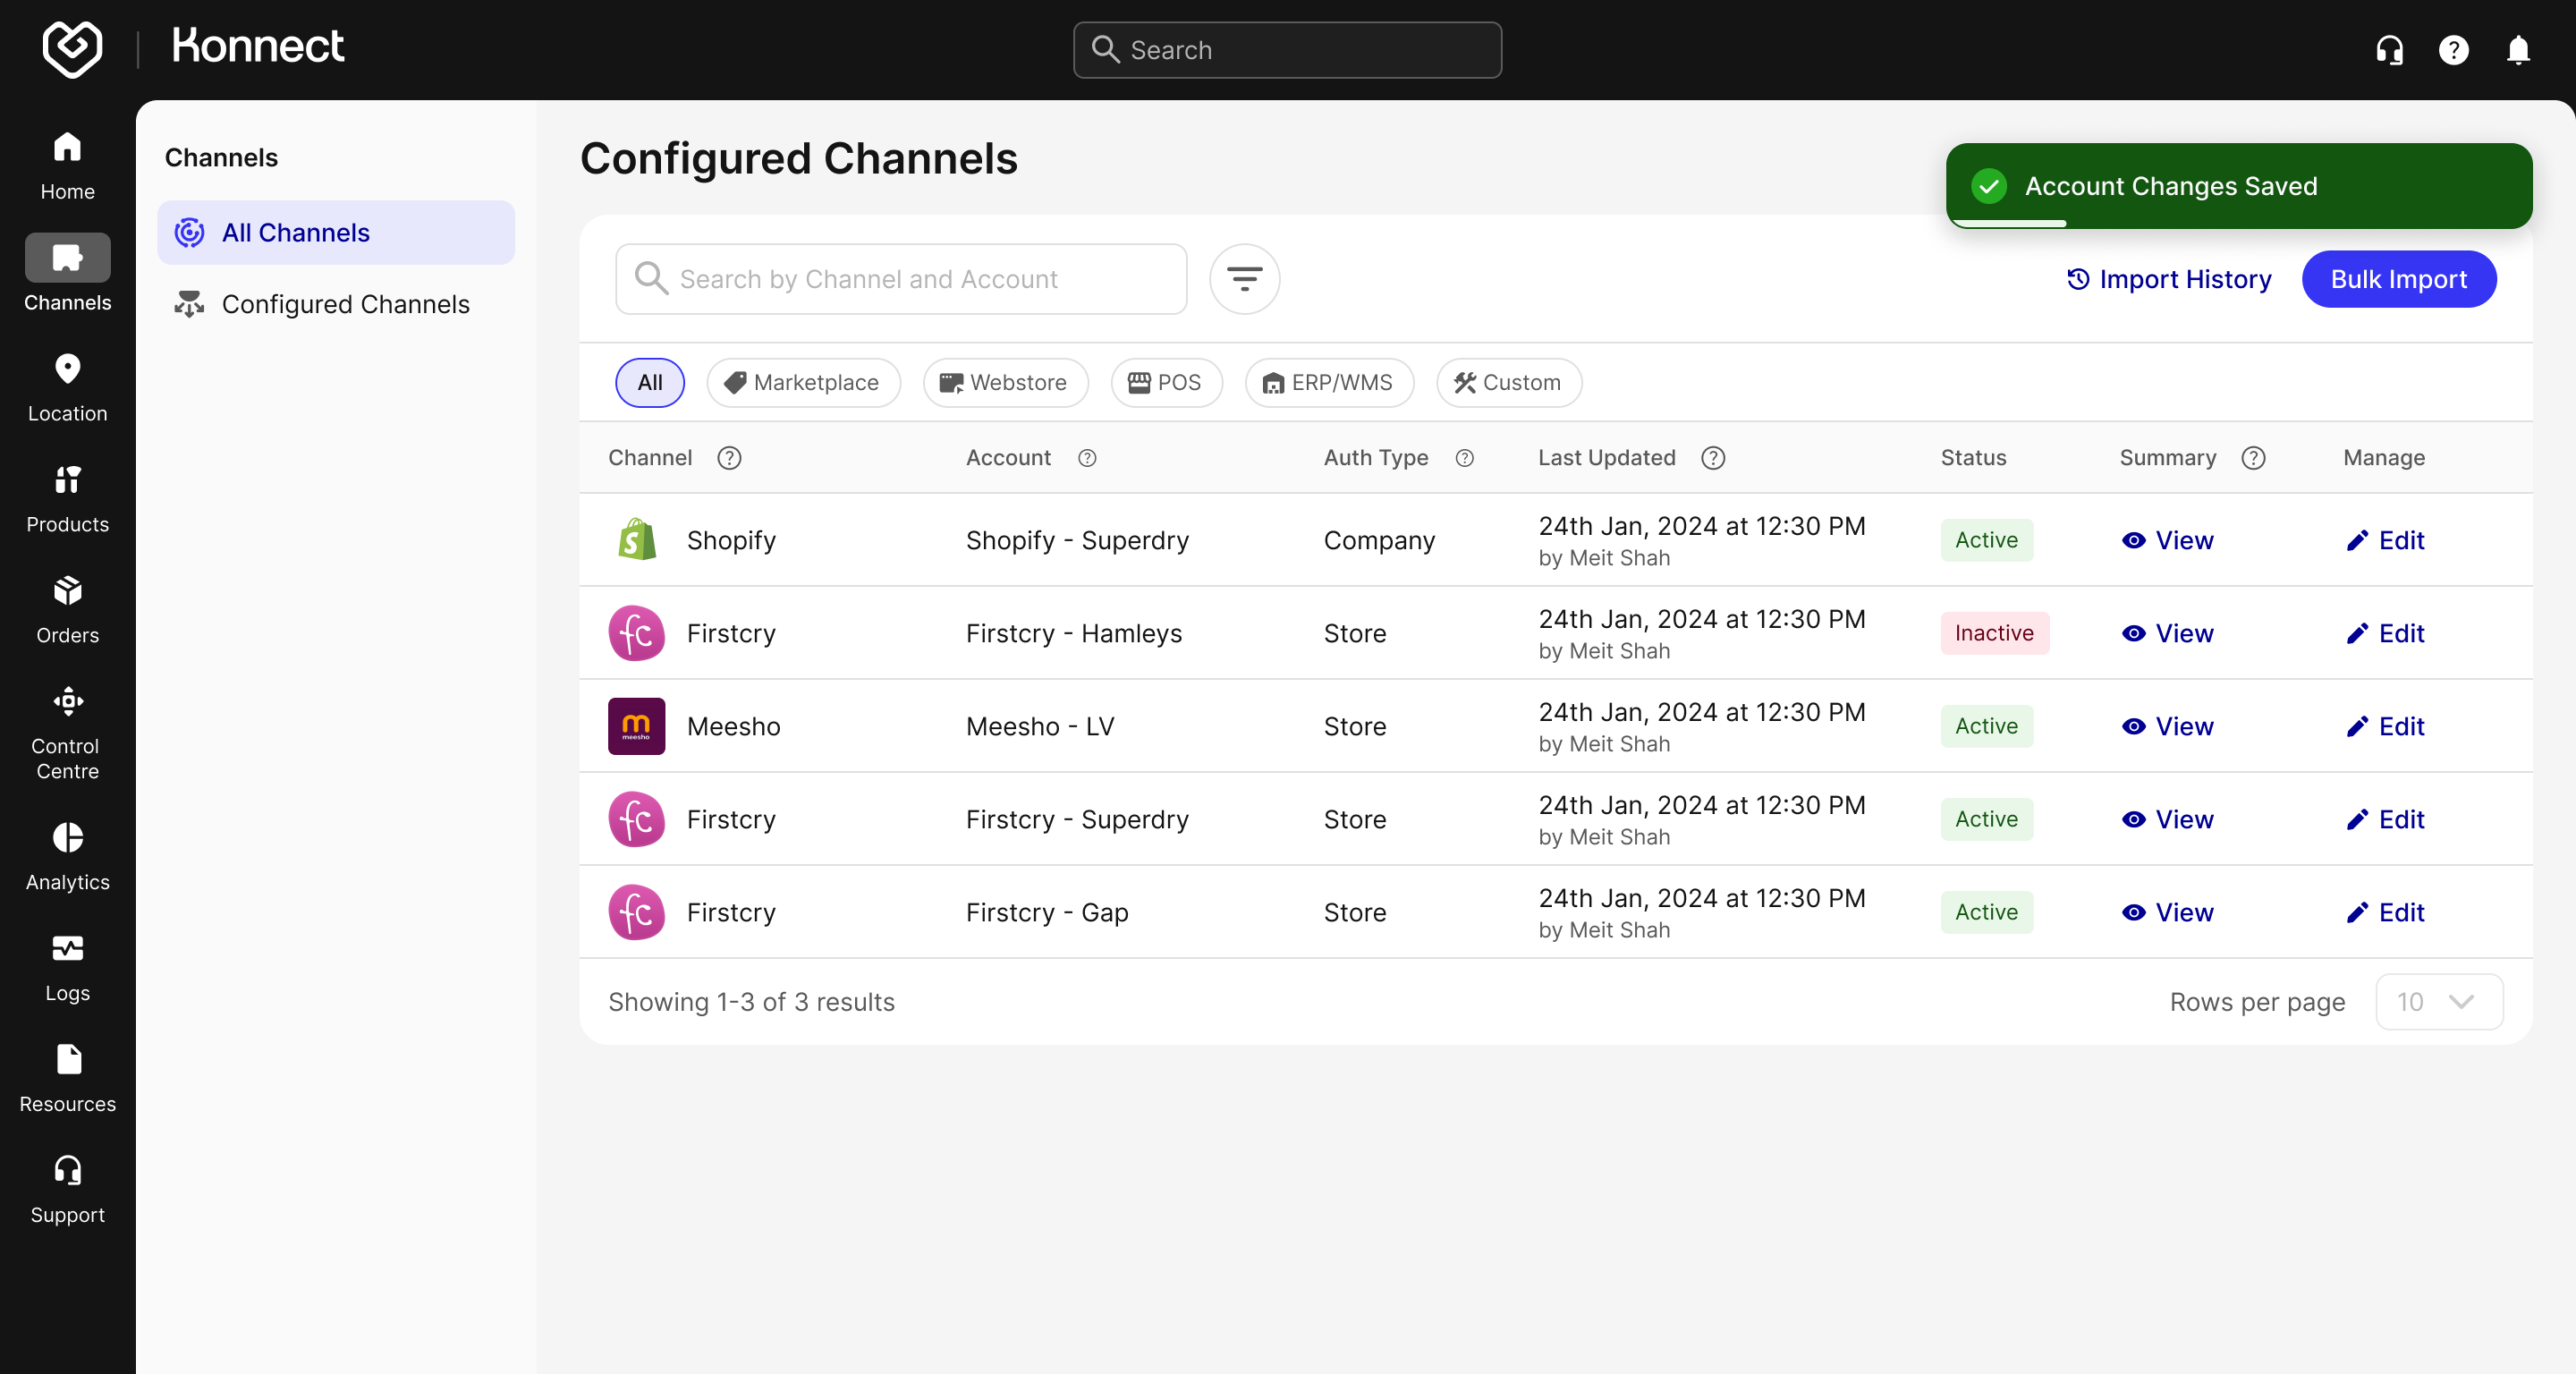
Initiate Configuration
- Navigate to Channels
- In the left-hand navigation, click Channels → All Channels.
- Locate the Live or Configured channel you wish to configure and click the Configure button.

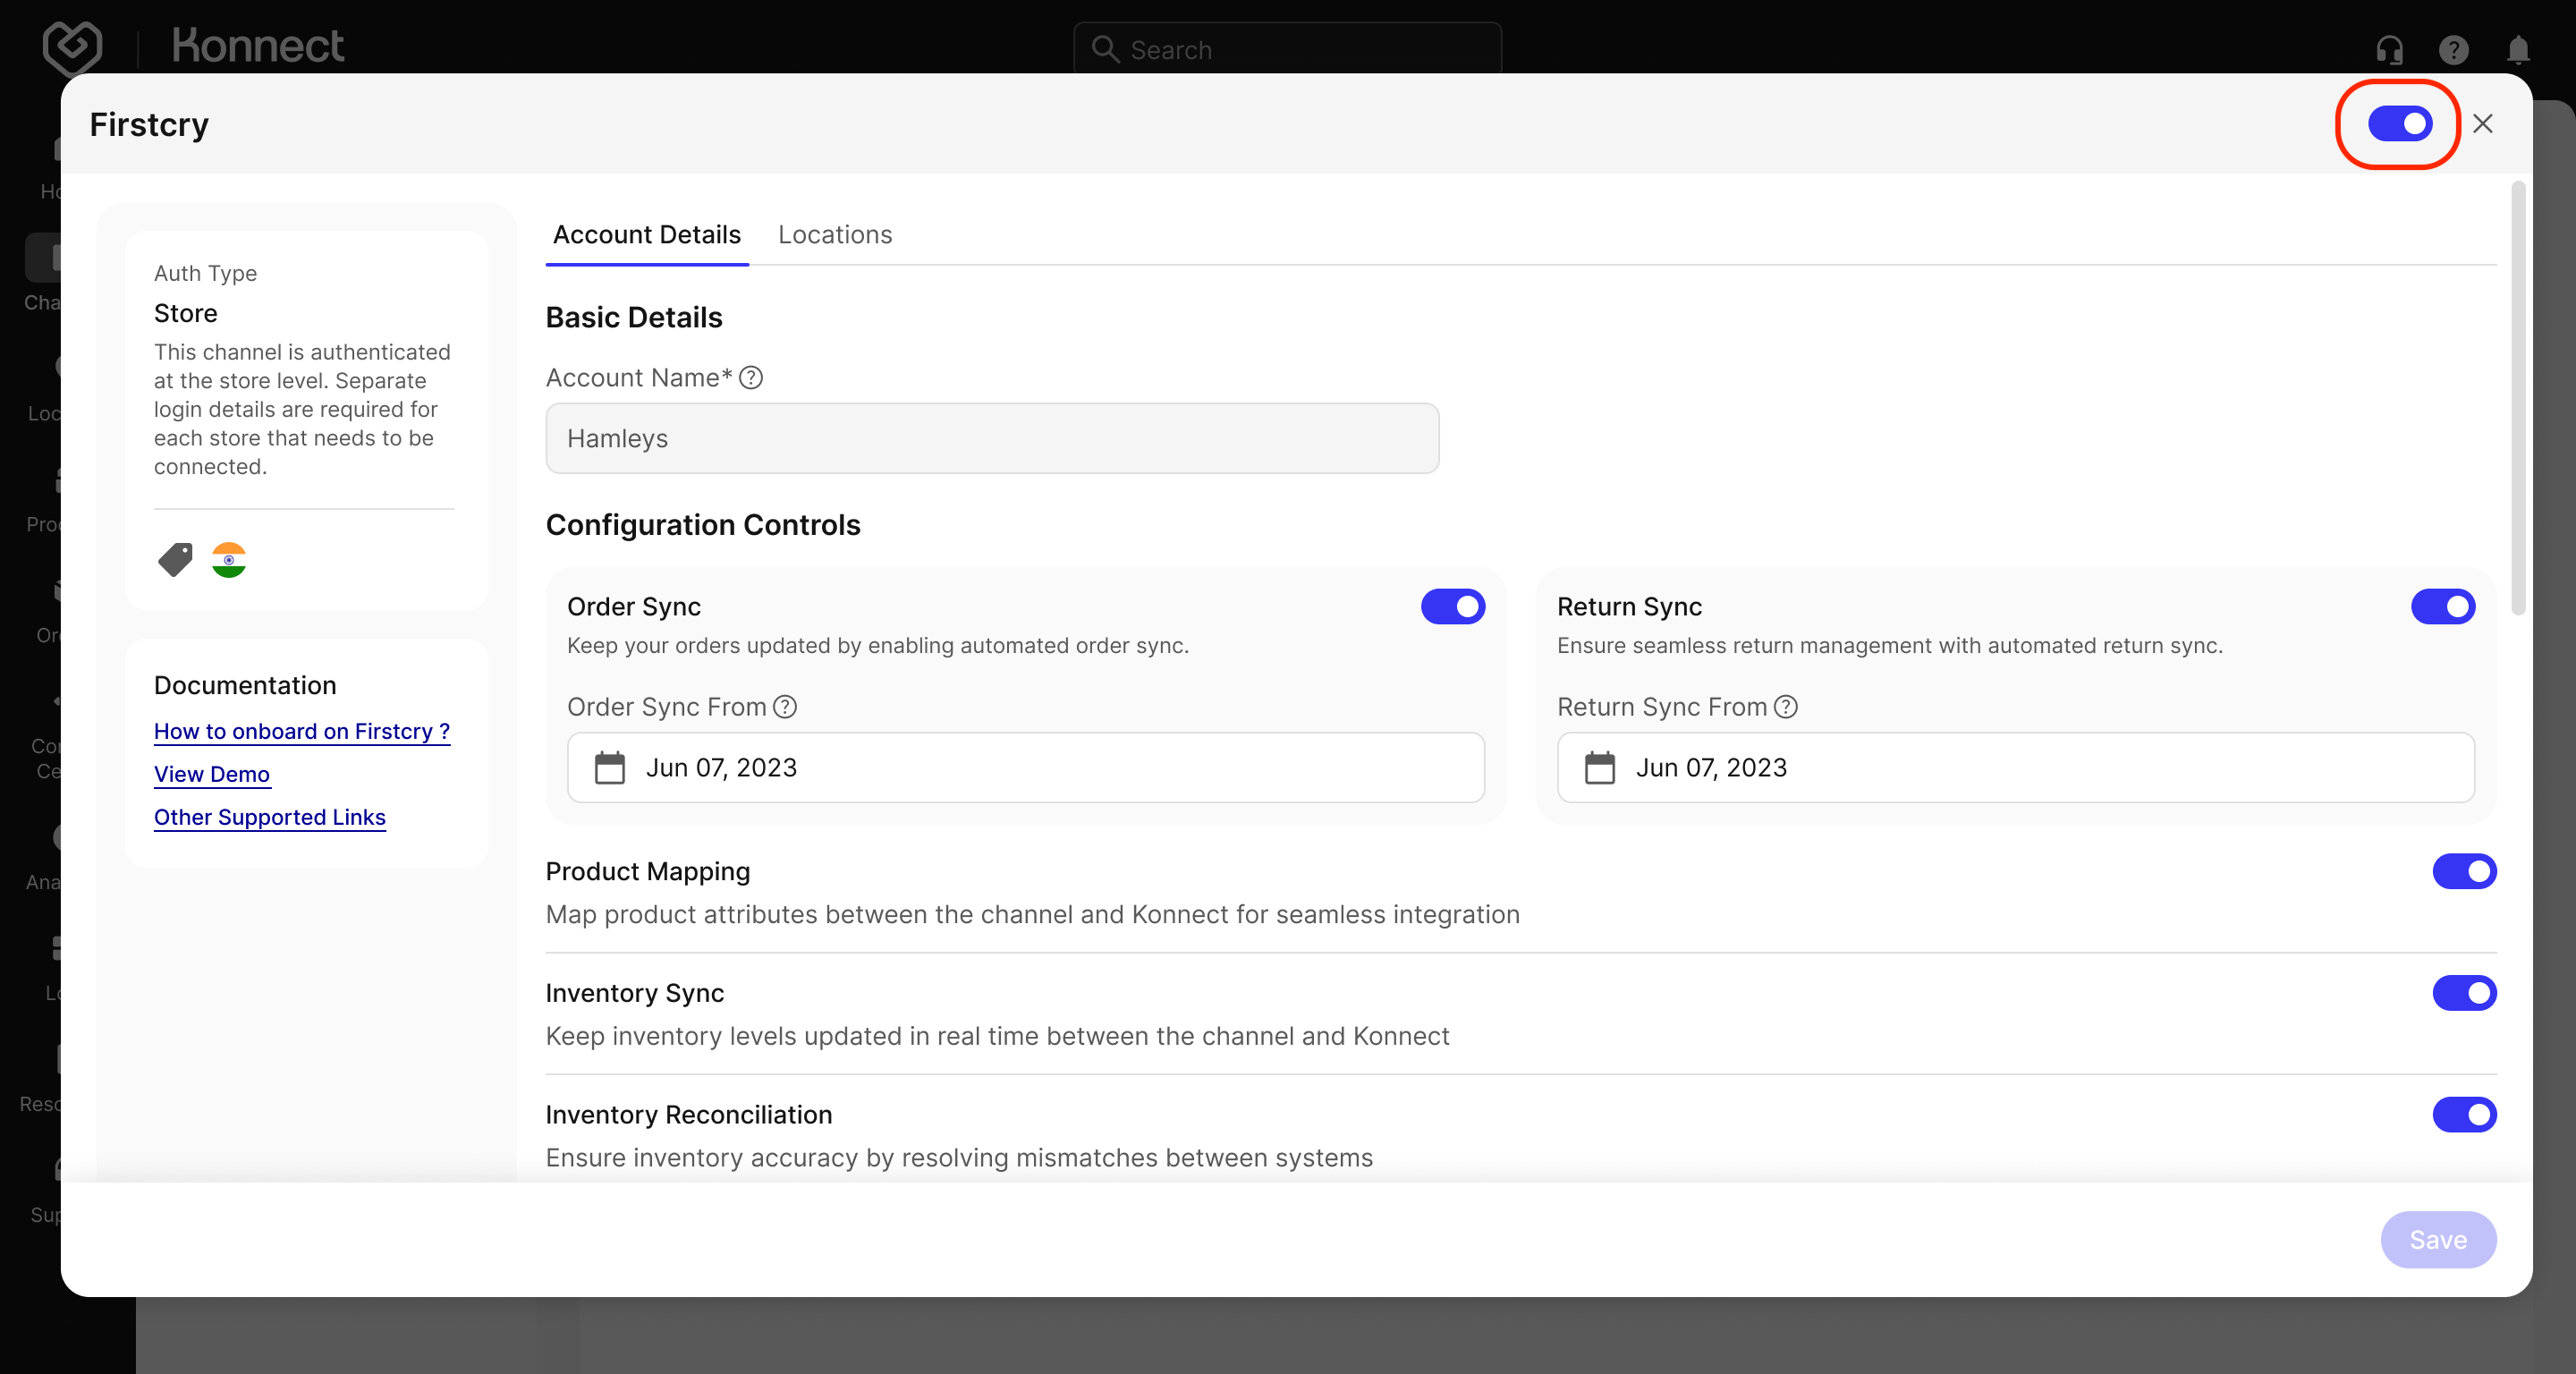
Account Details
On the Account Details tab, you’ll provide essential information and configure key settings for the channel.
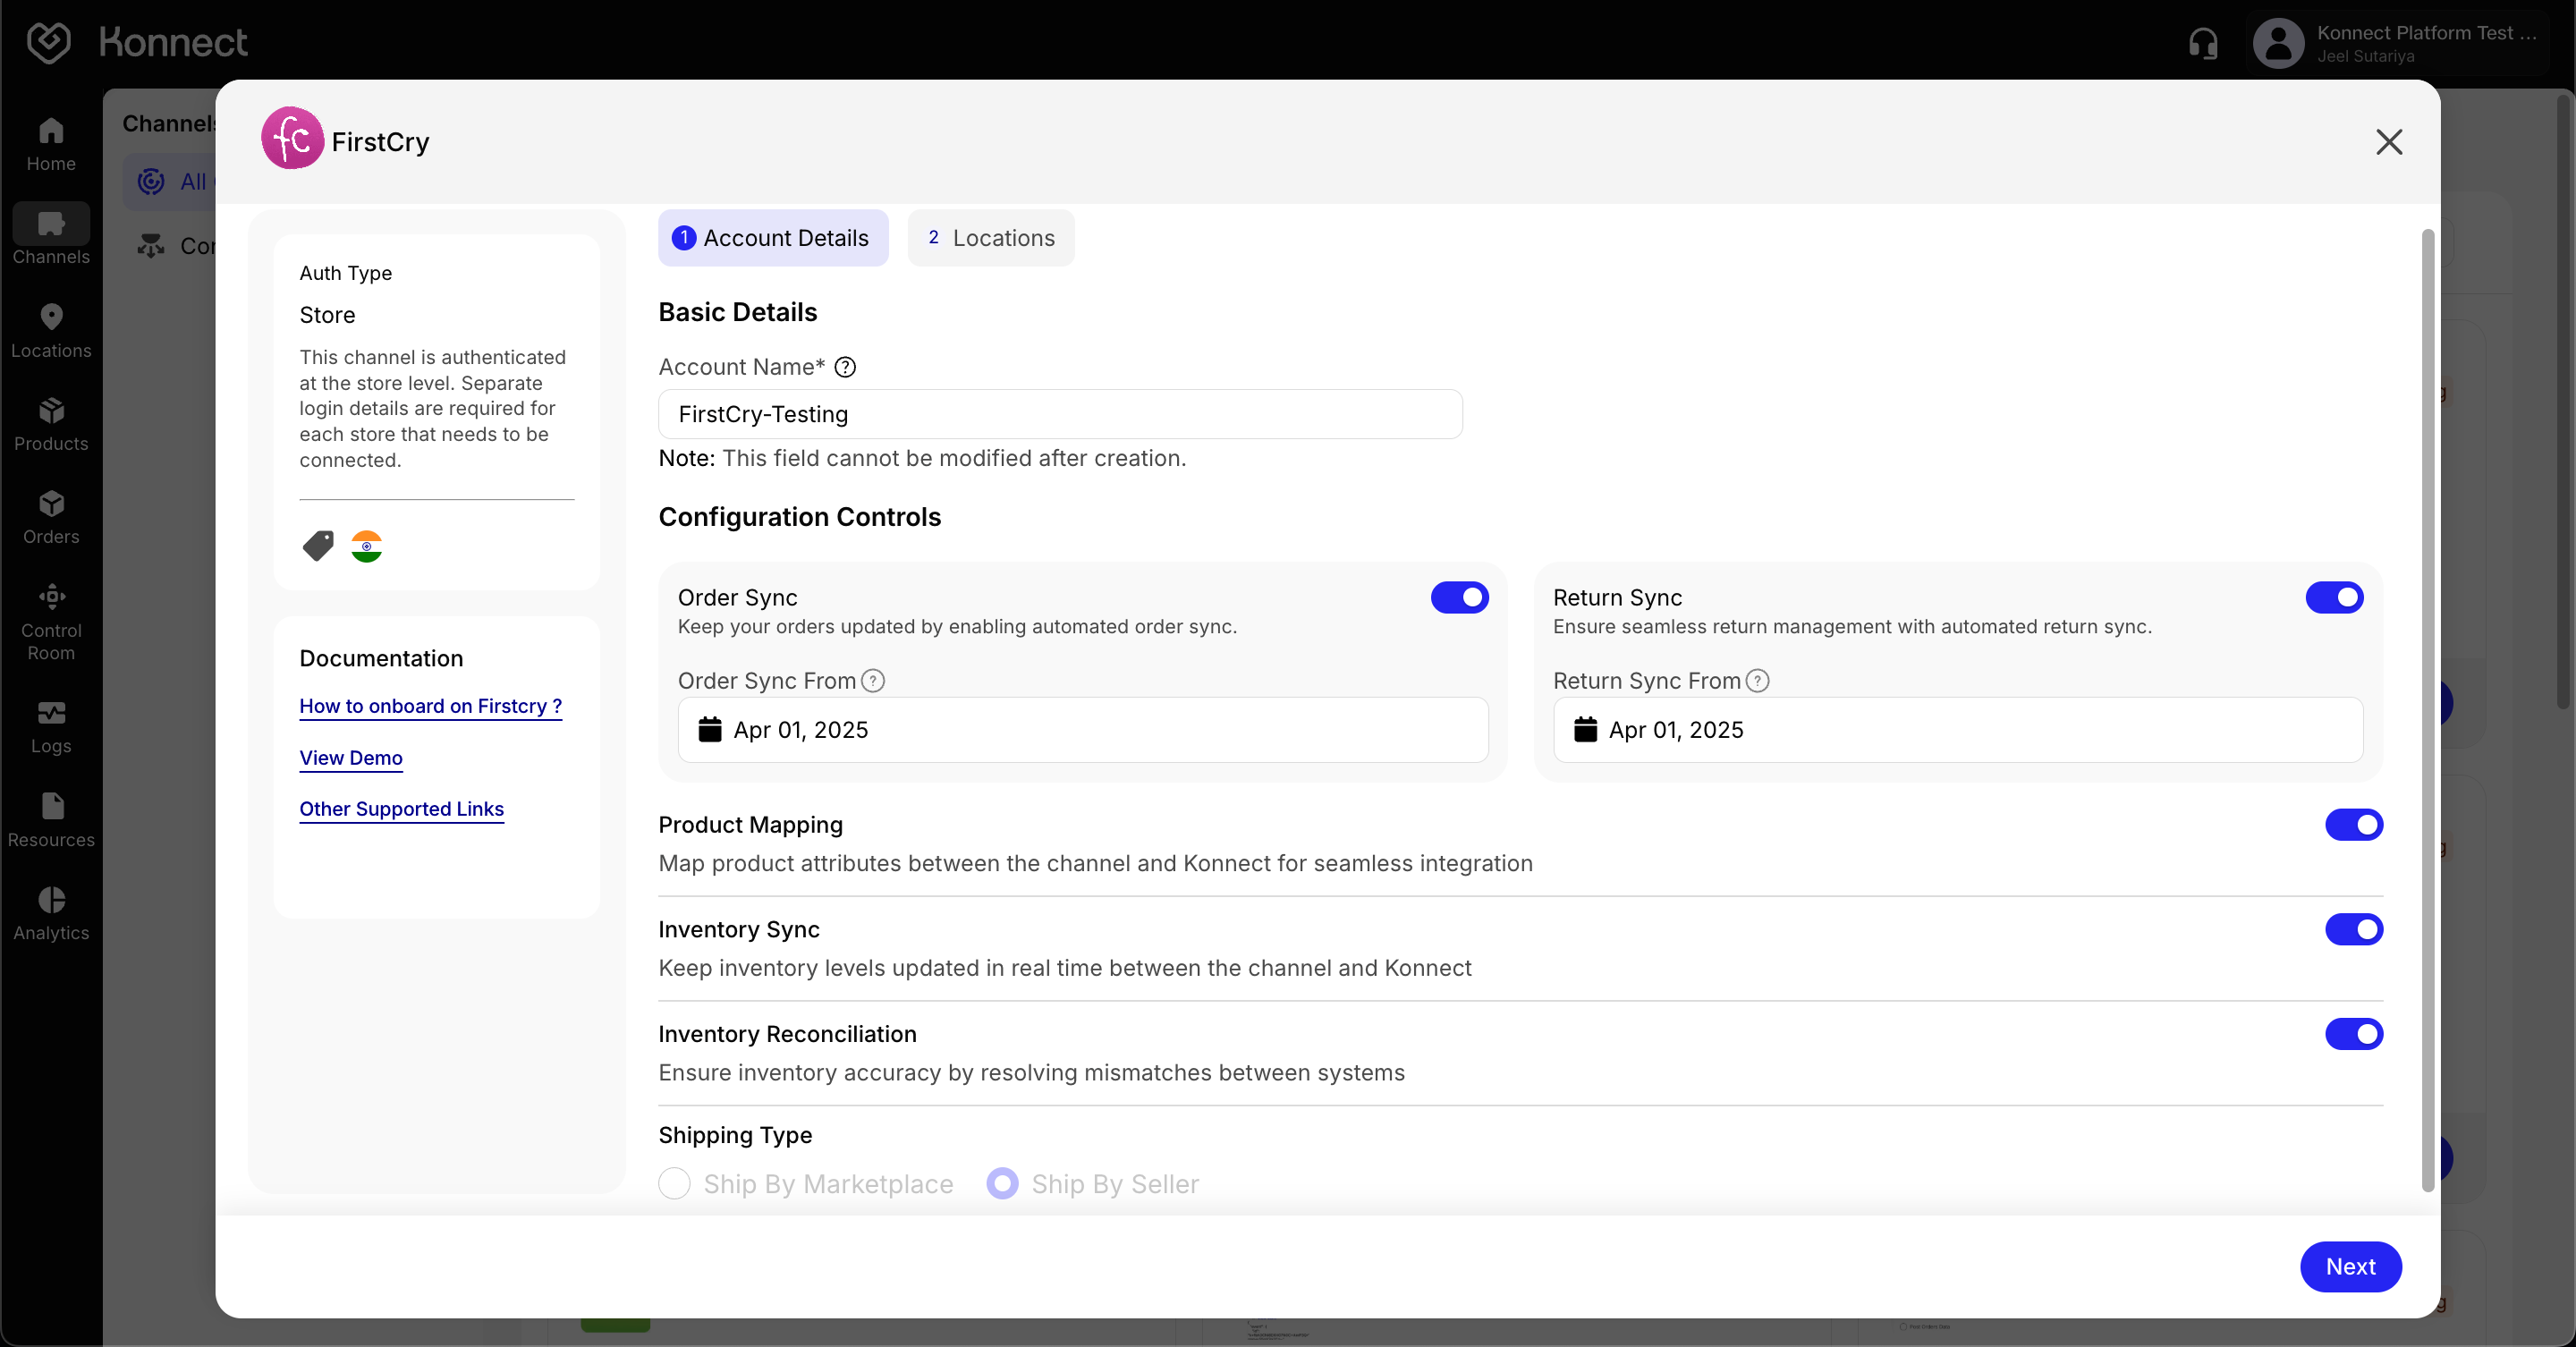
- Enter a unique Account Name for this channel.
Account name cannot be changed once the channel is configured.
Configuration Controls
- Order Sync: Toggle if you want Konnect to automatically fetch orders from this channel. You can also select the date from which you want orders to start syncing. Orders created before this date will not be fetched.
- Return Sync: Toggle if you want to manage returns from this channel in Konnect. You can choose the date from which returns should start syncing.
- Product Mapping: Toggle to allow Konnect to map and update product attributes (like SKUs, titles, descriptions) between this channel and Konnect.
- Inventory Sync: Toggle to keep stock levels updated in real time.
- Inventory Reconciliation: Toggle to allow Konnect to detect and resolve any mismatches in inventory between the channel and Konnect.
- Shipping Type: The shipping type is pre-populated based on the channel’s supported configuration, either Ship by Marketplace or Ship by Seller.
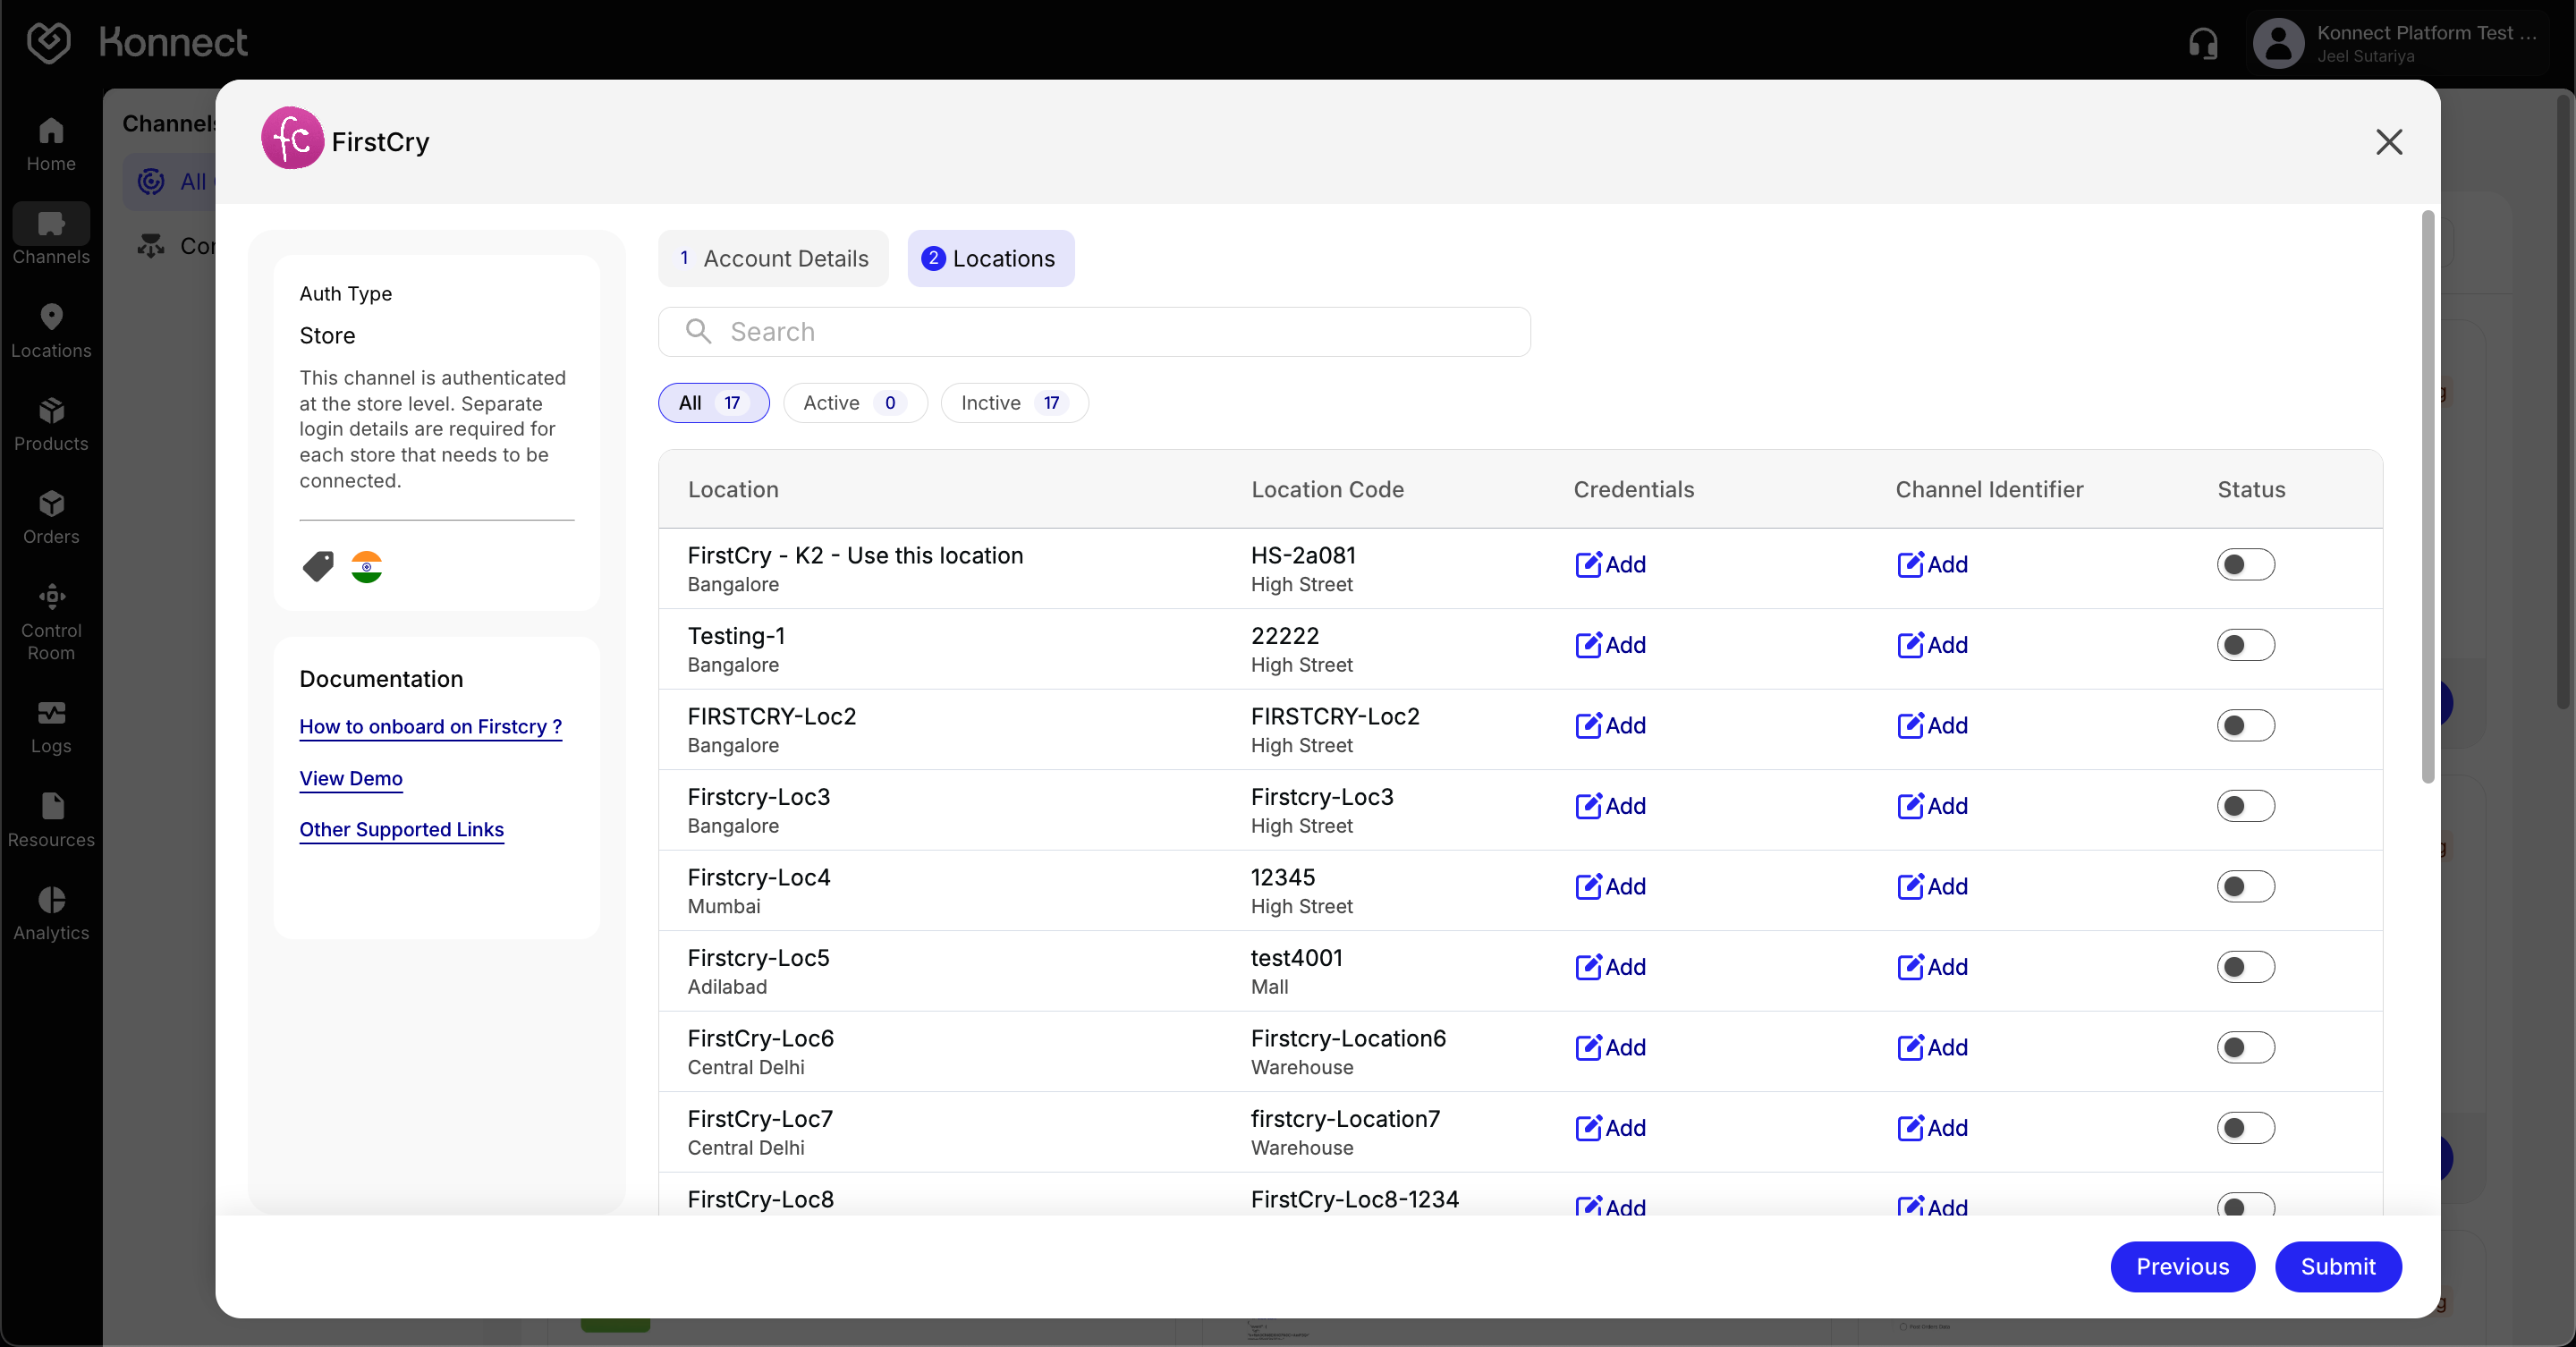
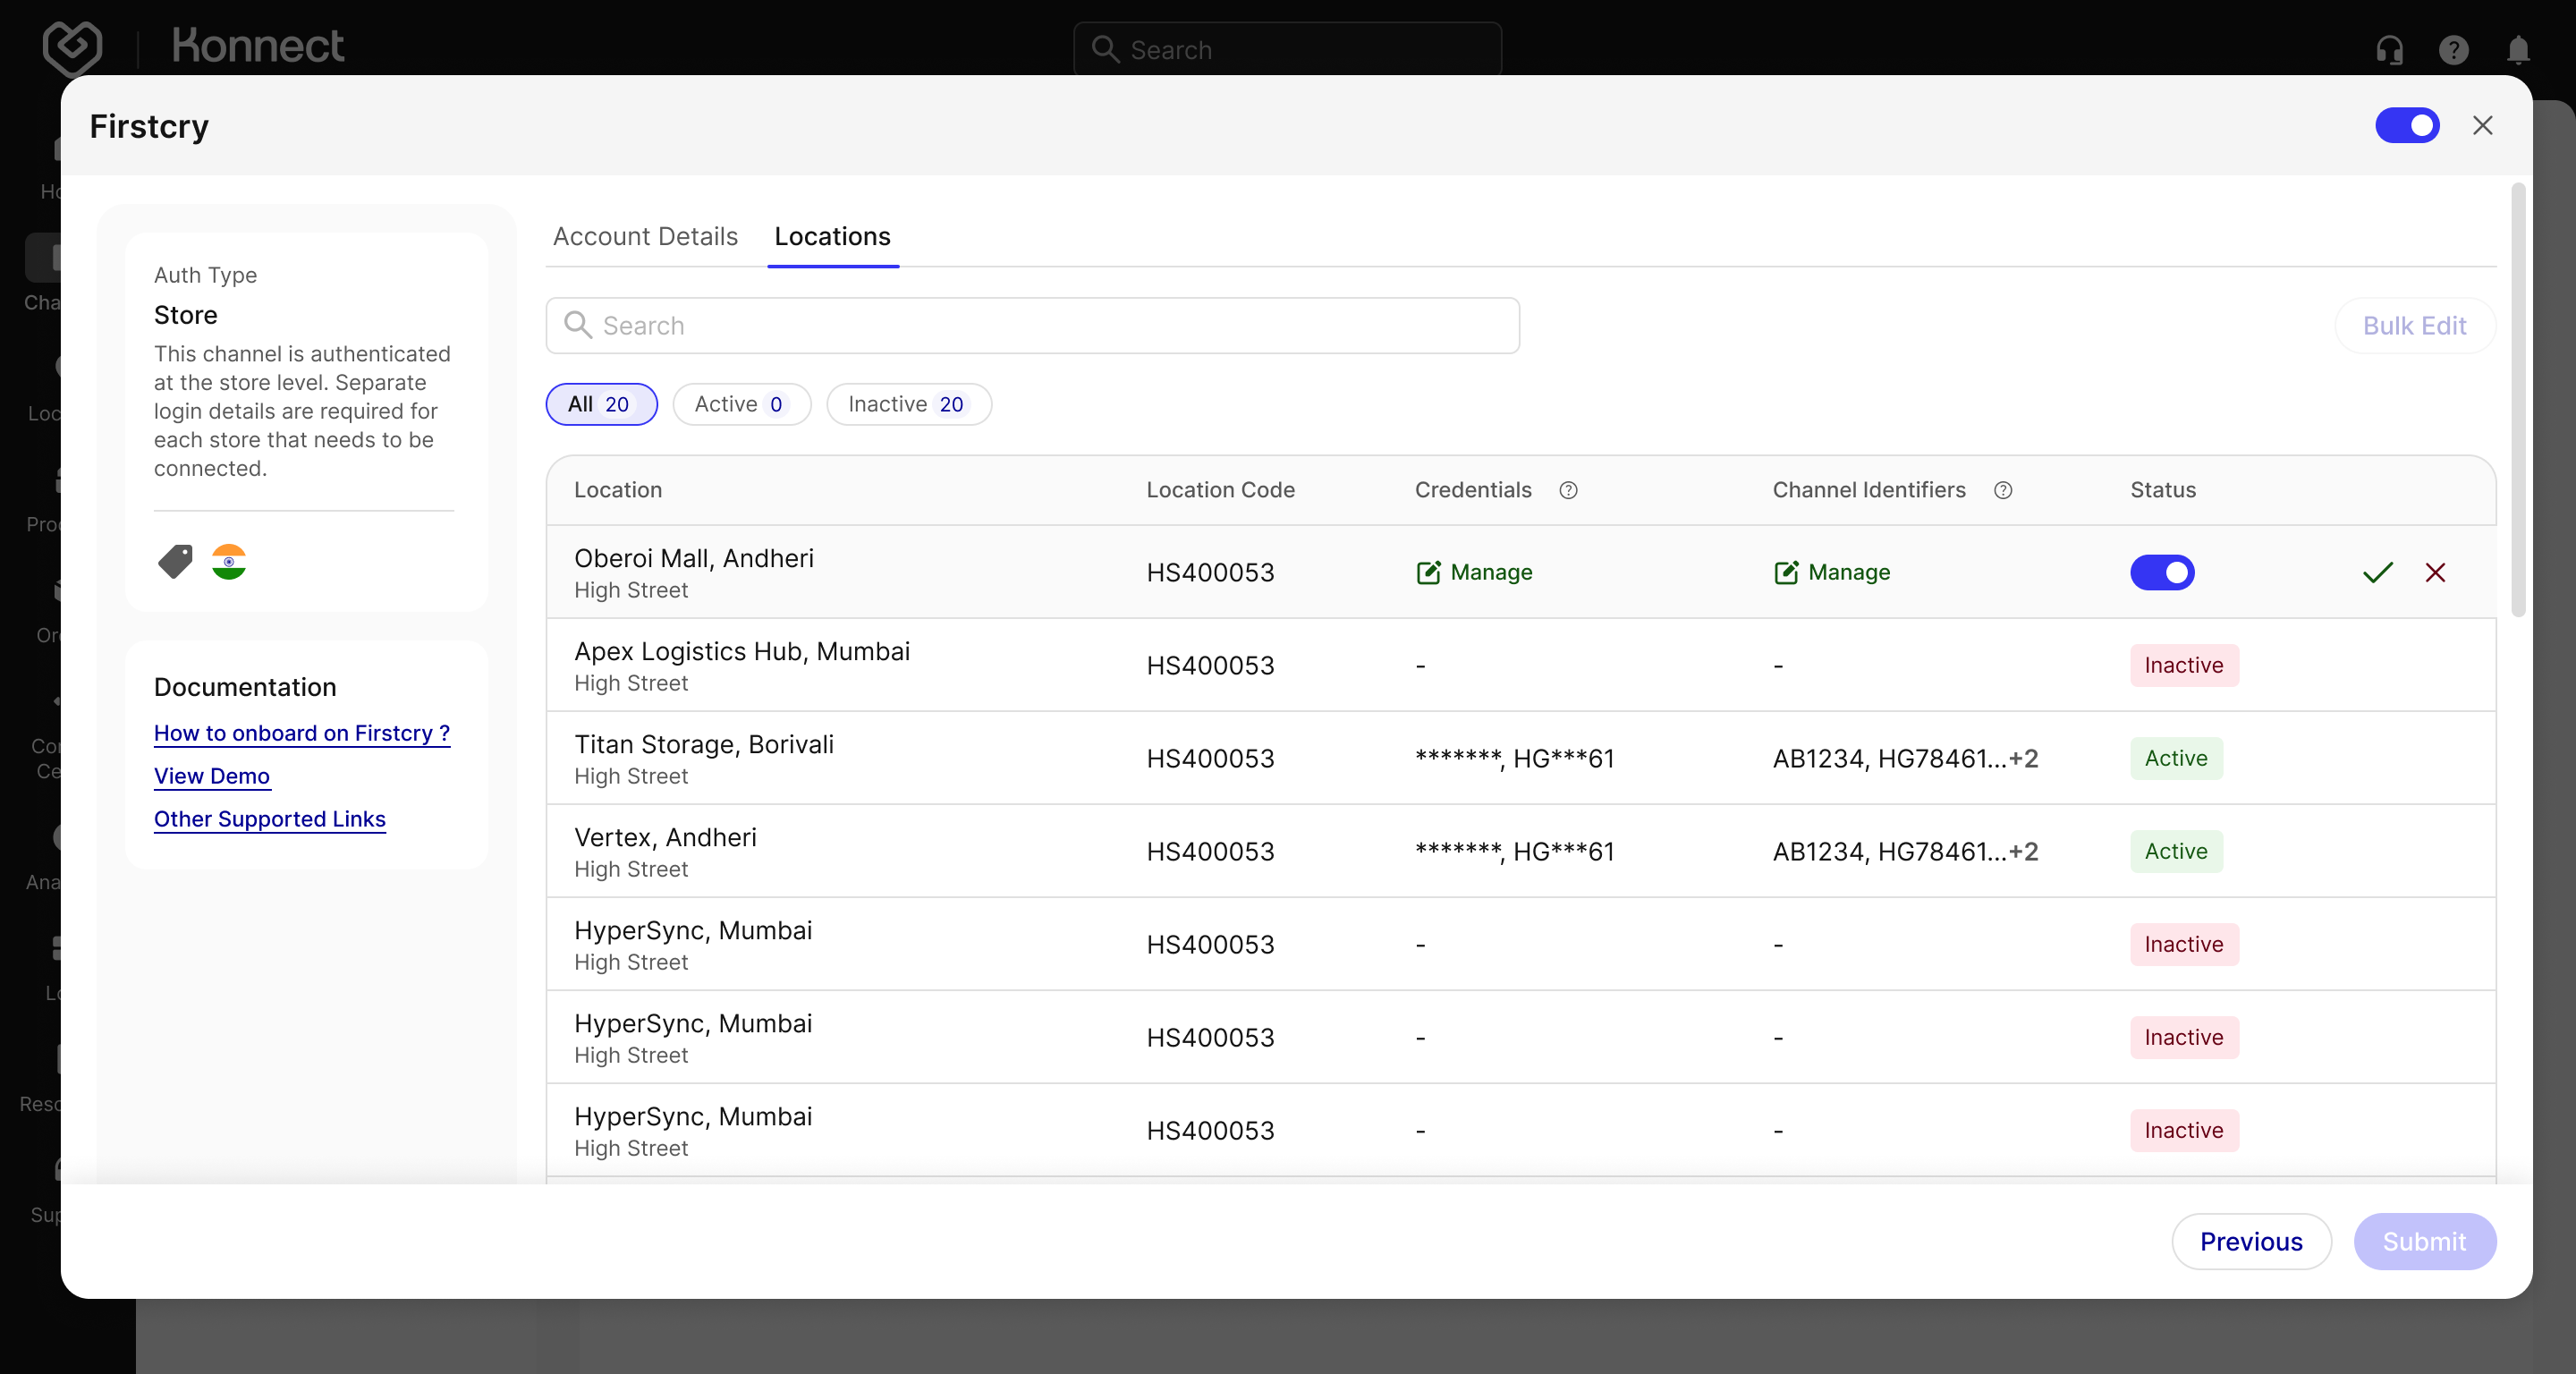
Configure Locations
After completing Account Details, switch to the Locations tab.
- Each row represents a single store or warehouse, displaying columns such as Location Name, Location Code, Credentials, Channel Identifiers, and Status. Use the search bar or filters (All, Active, Inactive) to locate specific locations quickly.
Adding Credentials and Channel Identifiers
- Under the Credentials column, click Add (or Manage to update existing ones) to configure the location. Then click Validate.
- After the credentials are validated, Add the required Channel Identifiers for that location as specified by your channel. These identifiers inform the external channel how to recognize each physical location in Konnect.
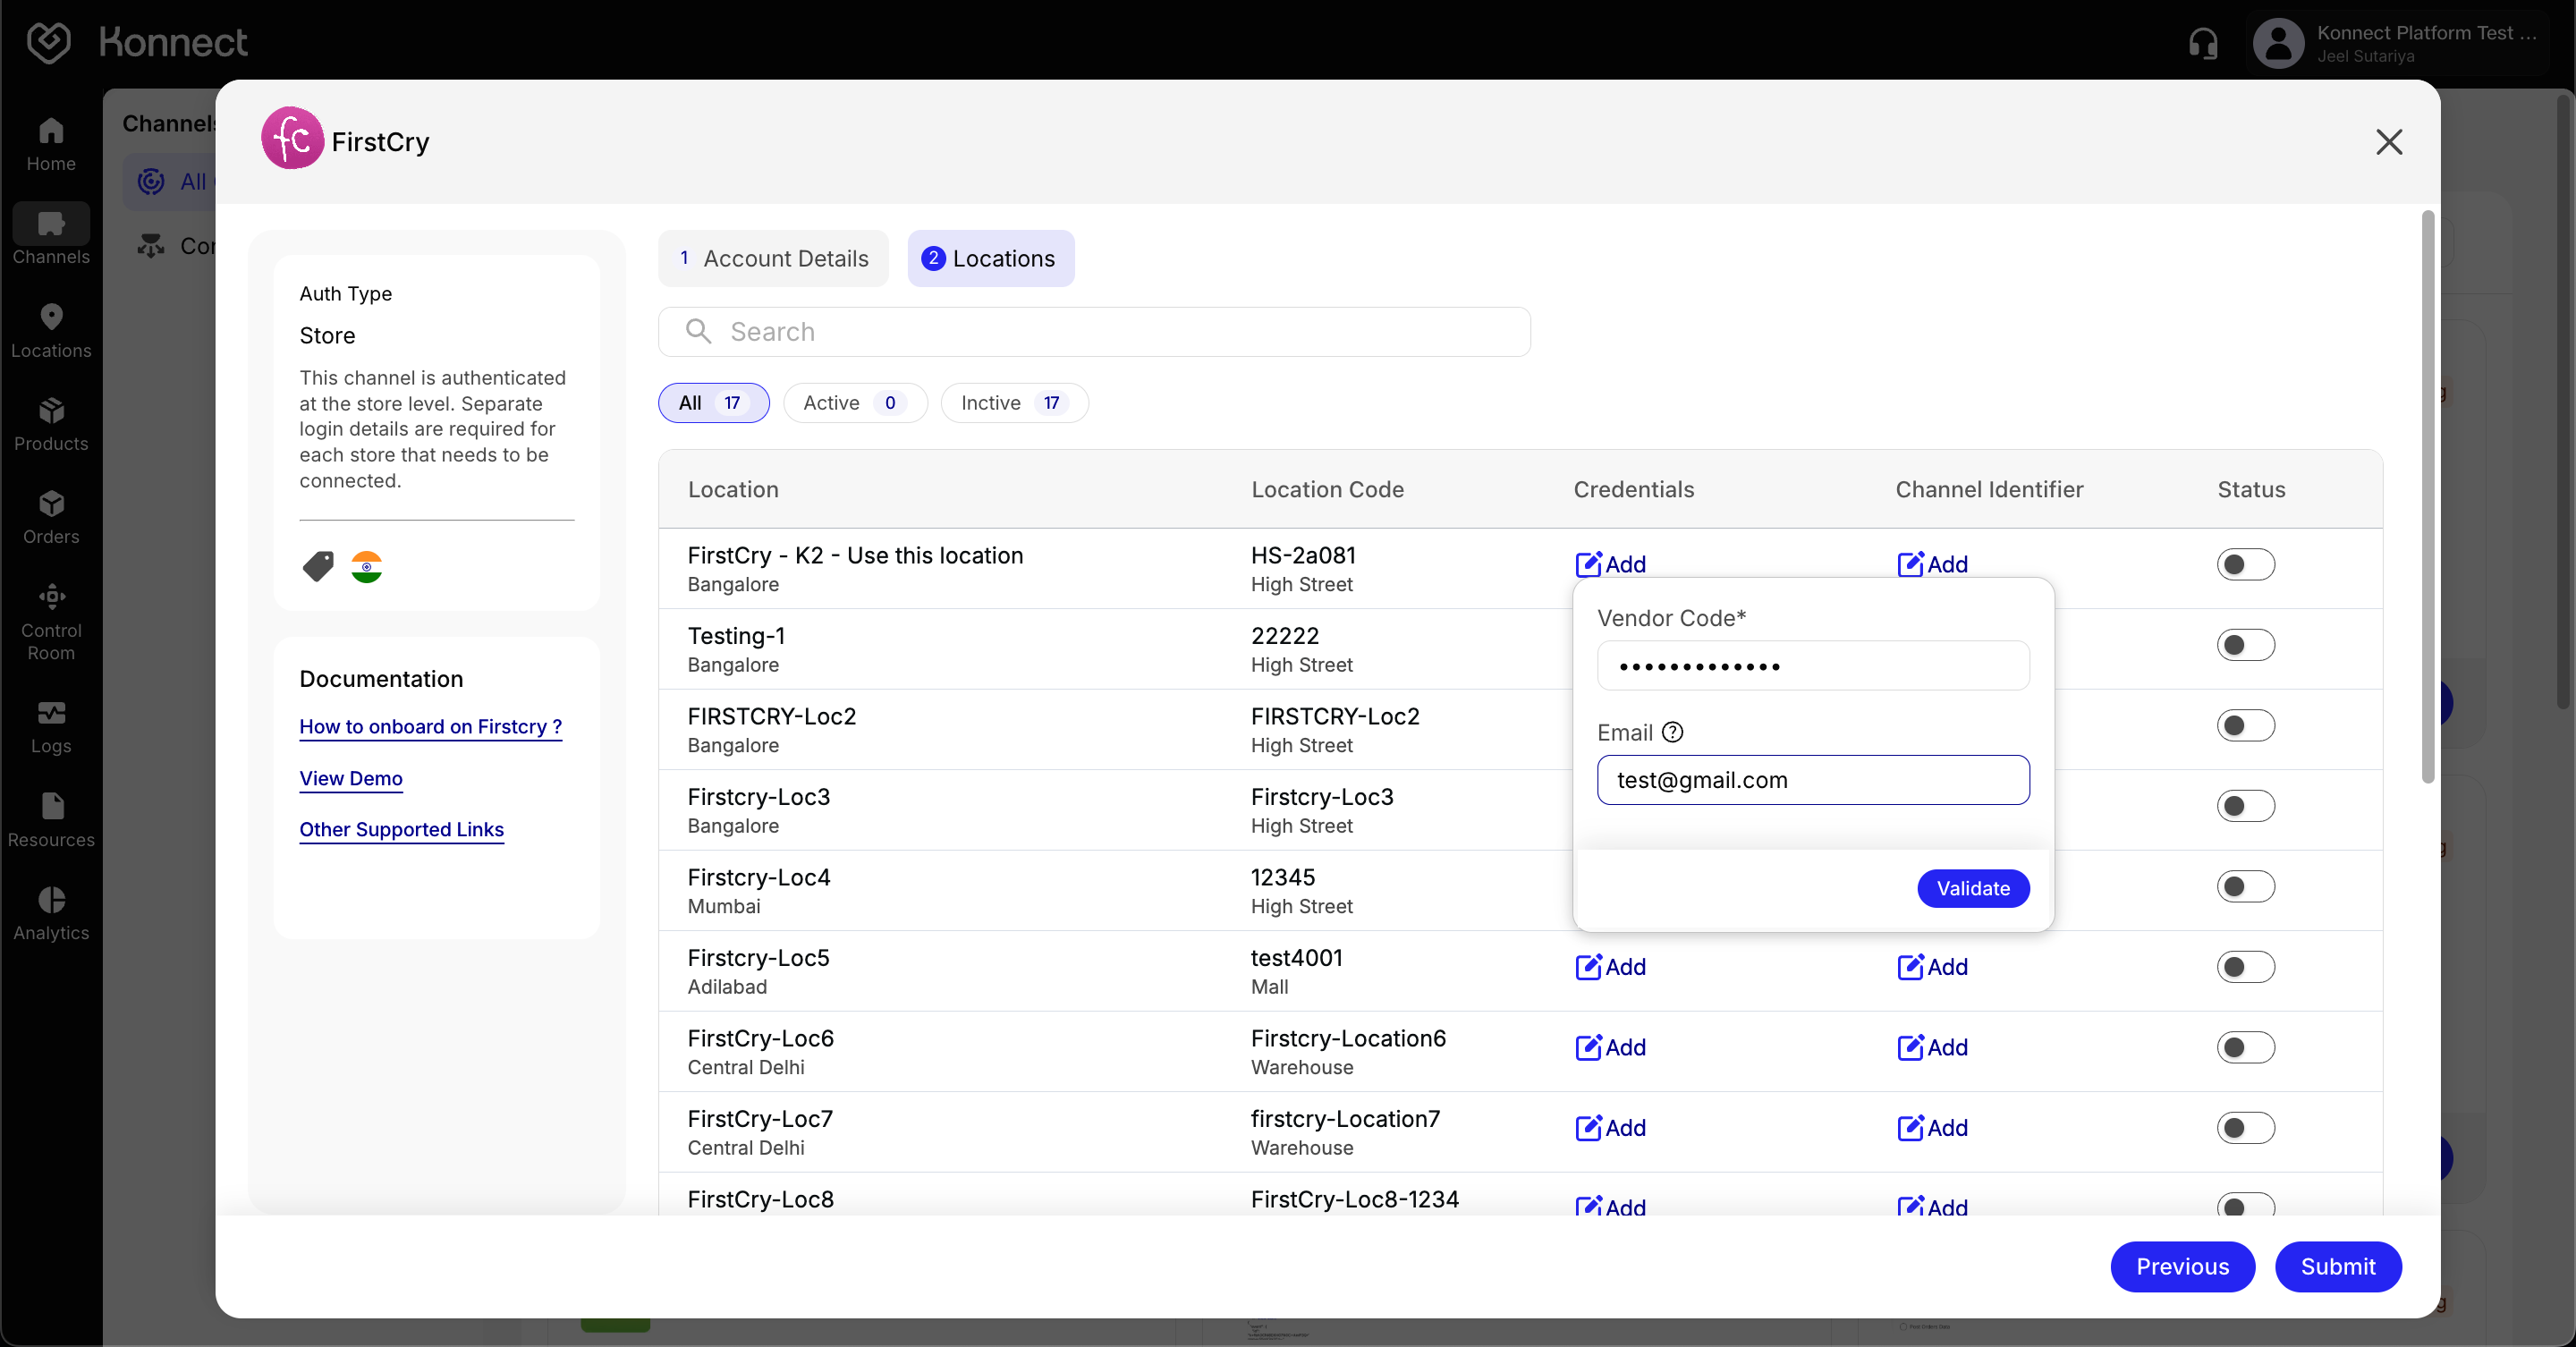
Figure 4: Adding Credentials and Channel Identifiers Depending on the channel, you may be required to provide specific credentials and channel identifiers. Please refer to the channel-specific Konnect documentation for details.
Toggle Location Status
- For each location, turn on the toggle under the Status column to mark that location as active. Active locations will start syncing data (orders, inventory) once the channel is activated.
Turn the toggle off to temporarily disable syncing for that specific location.
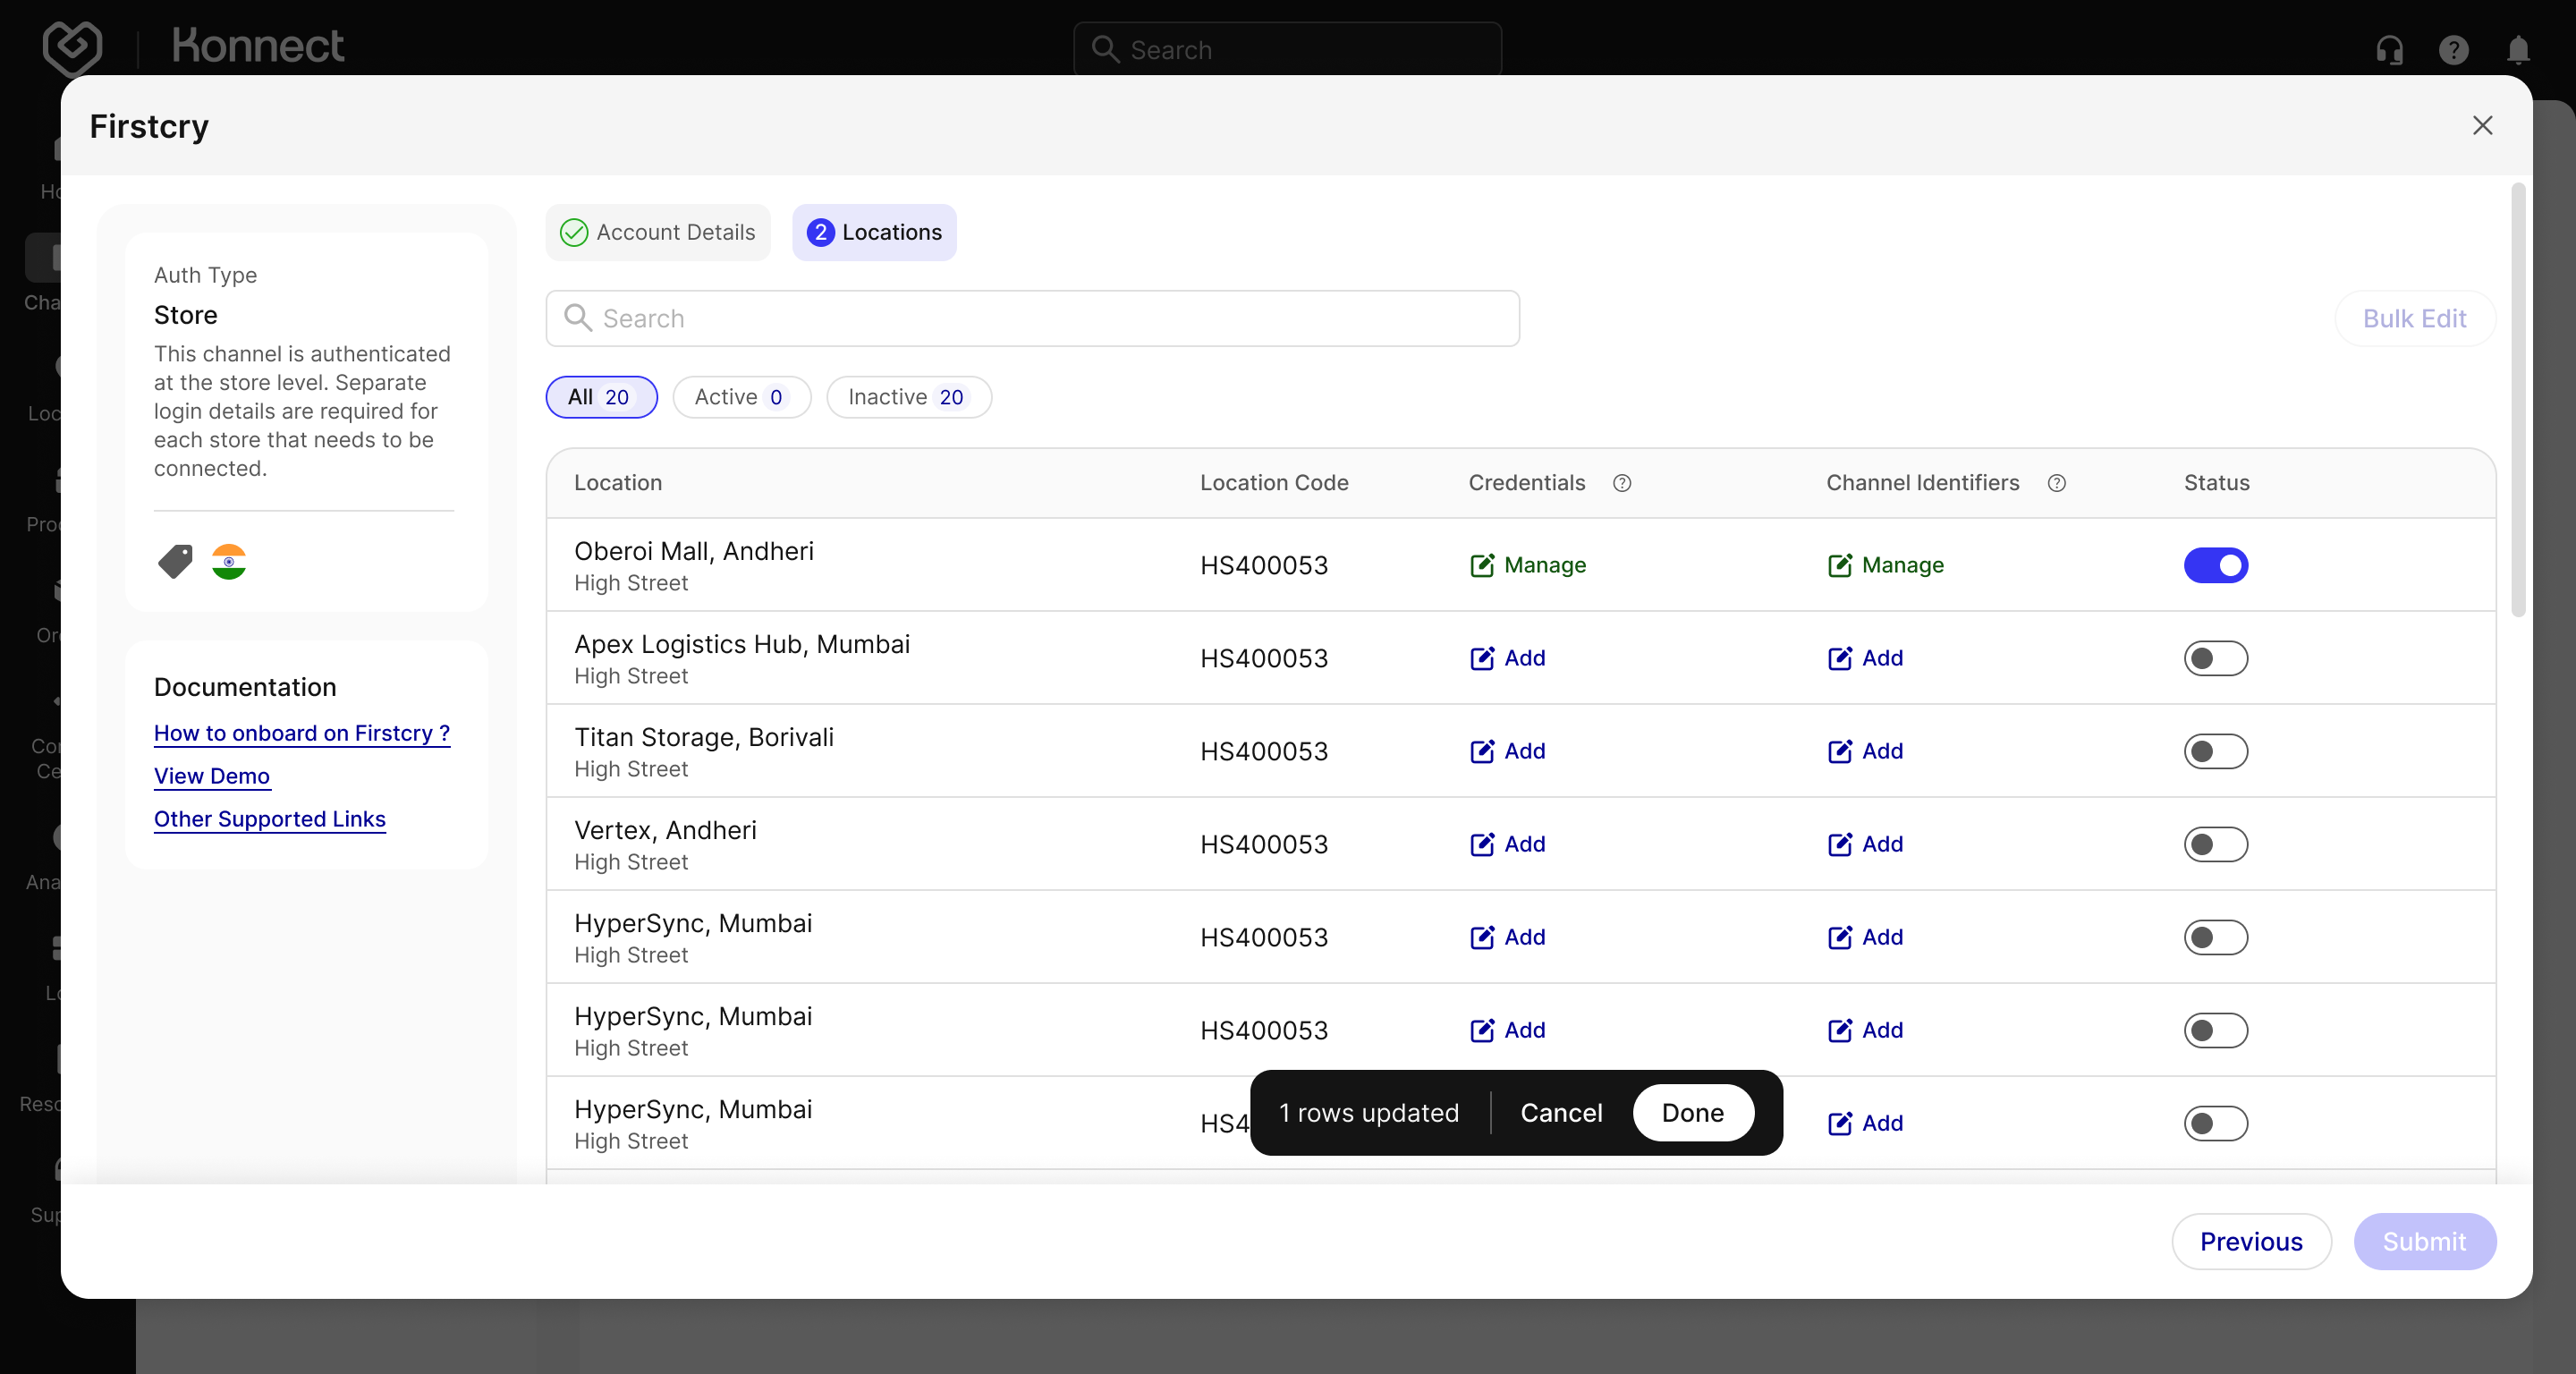
Figure 5: Toggle Location Status Bulk Edit: If you have many locations, click Bulk Edit to update credentials, channel identifiers, or statuses across multiple rows simultaneously.
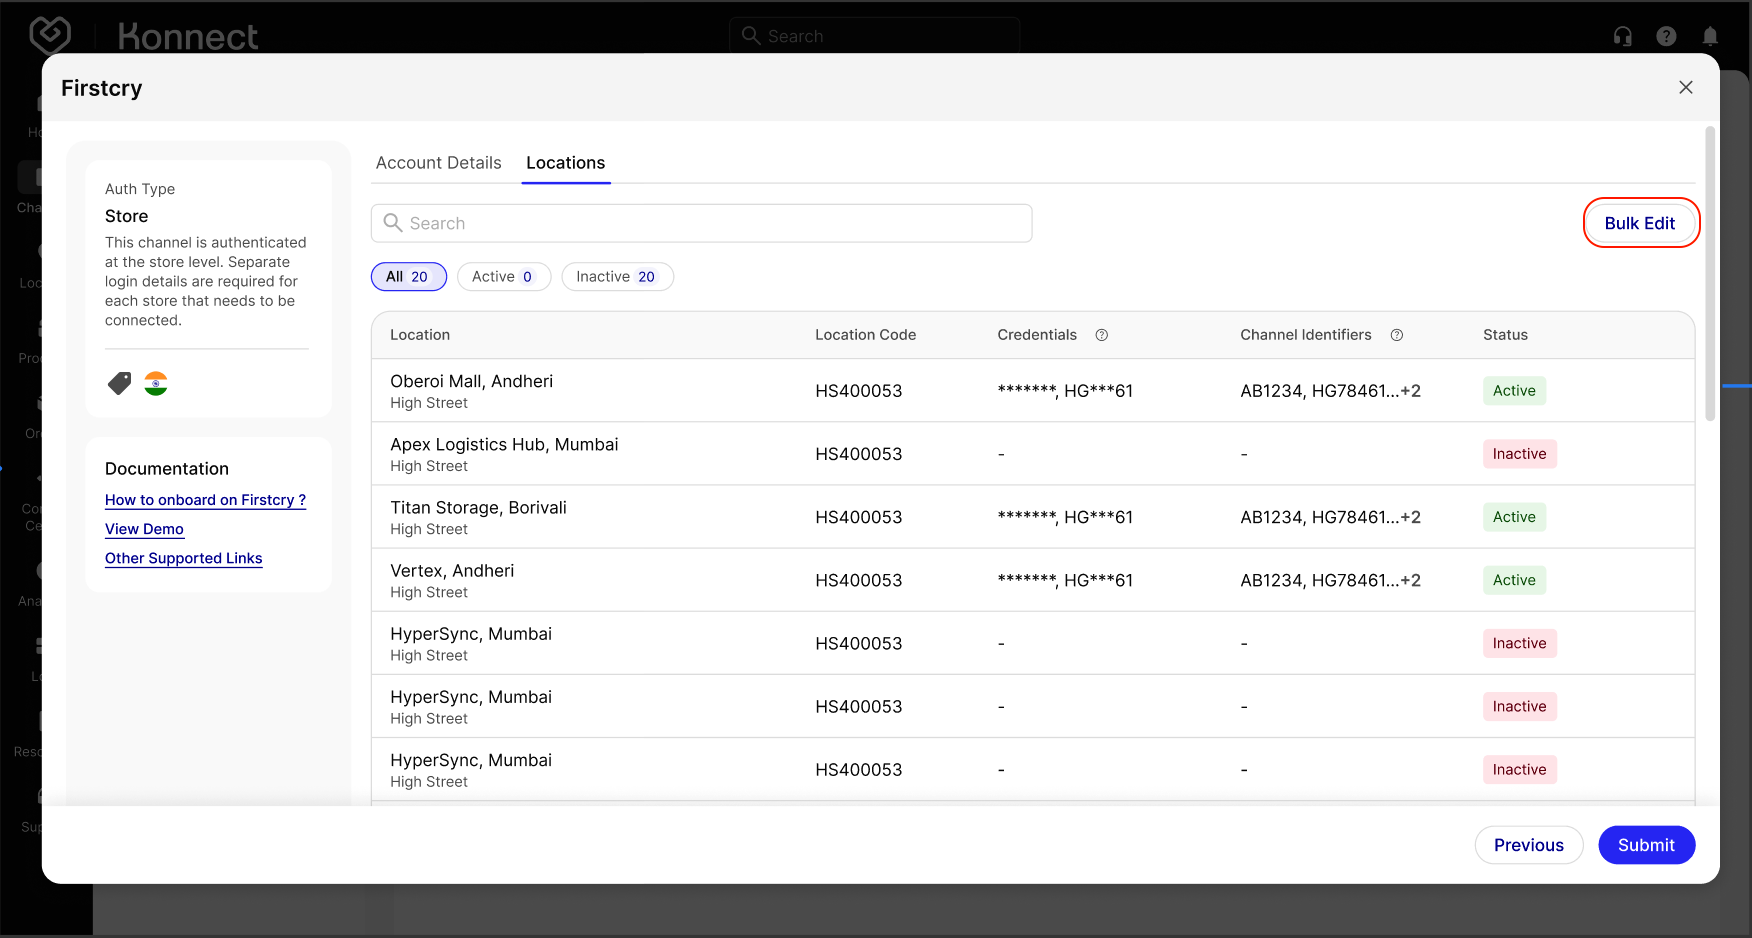
Figure 6: Locations Bulk Edit
Submitting & Going Live
- Ensure each location has valid credentials, correct channel identifiers, and the desired status. Verify the Account Name and Configuration Controls under Account Details.
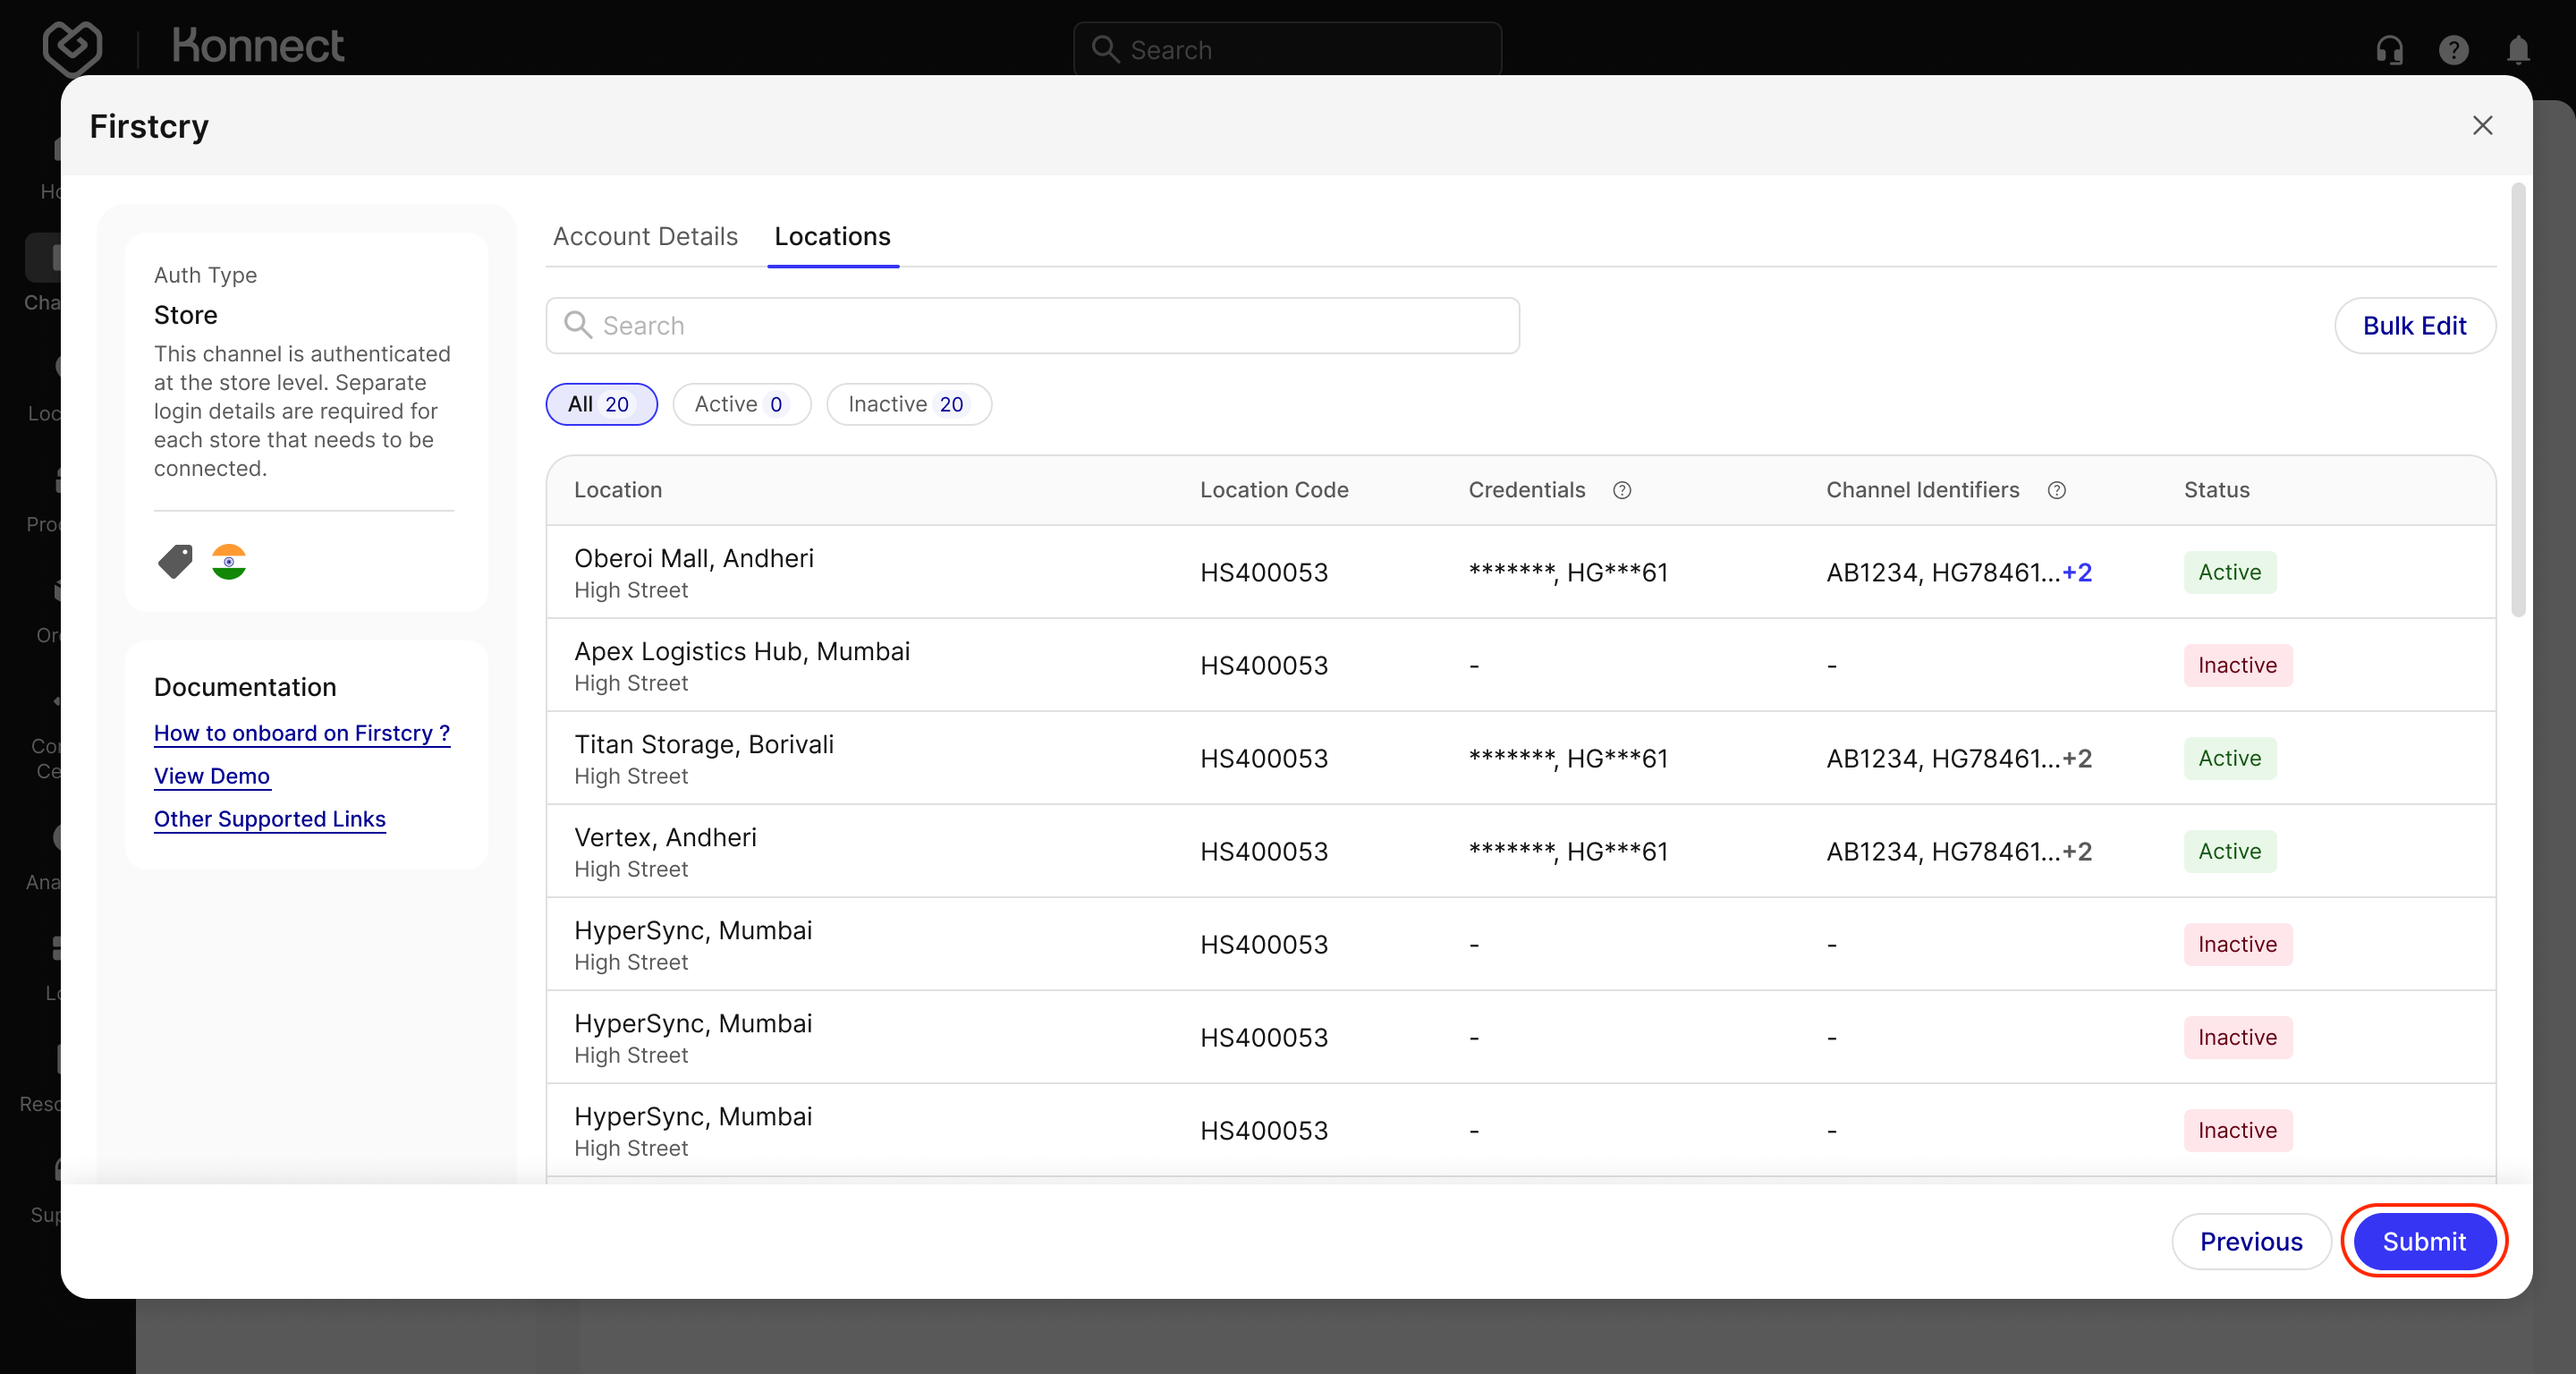
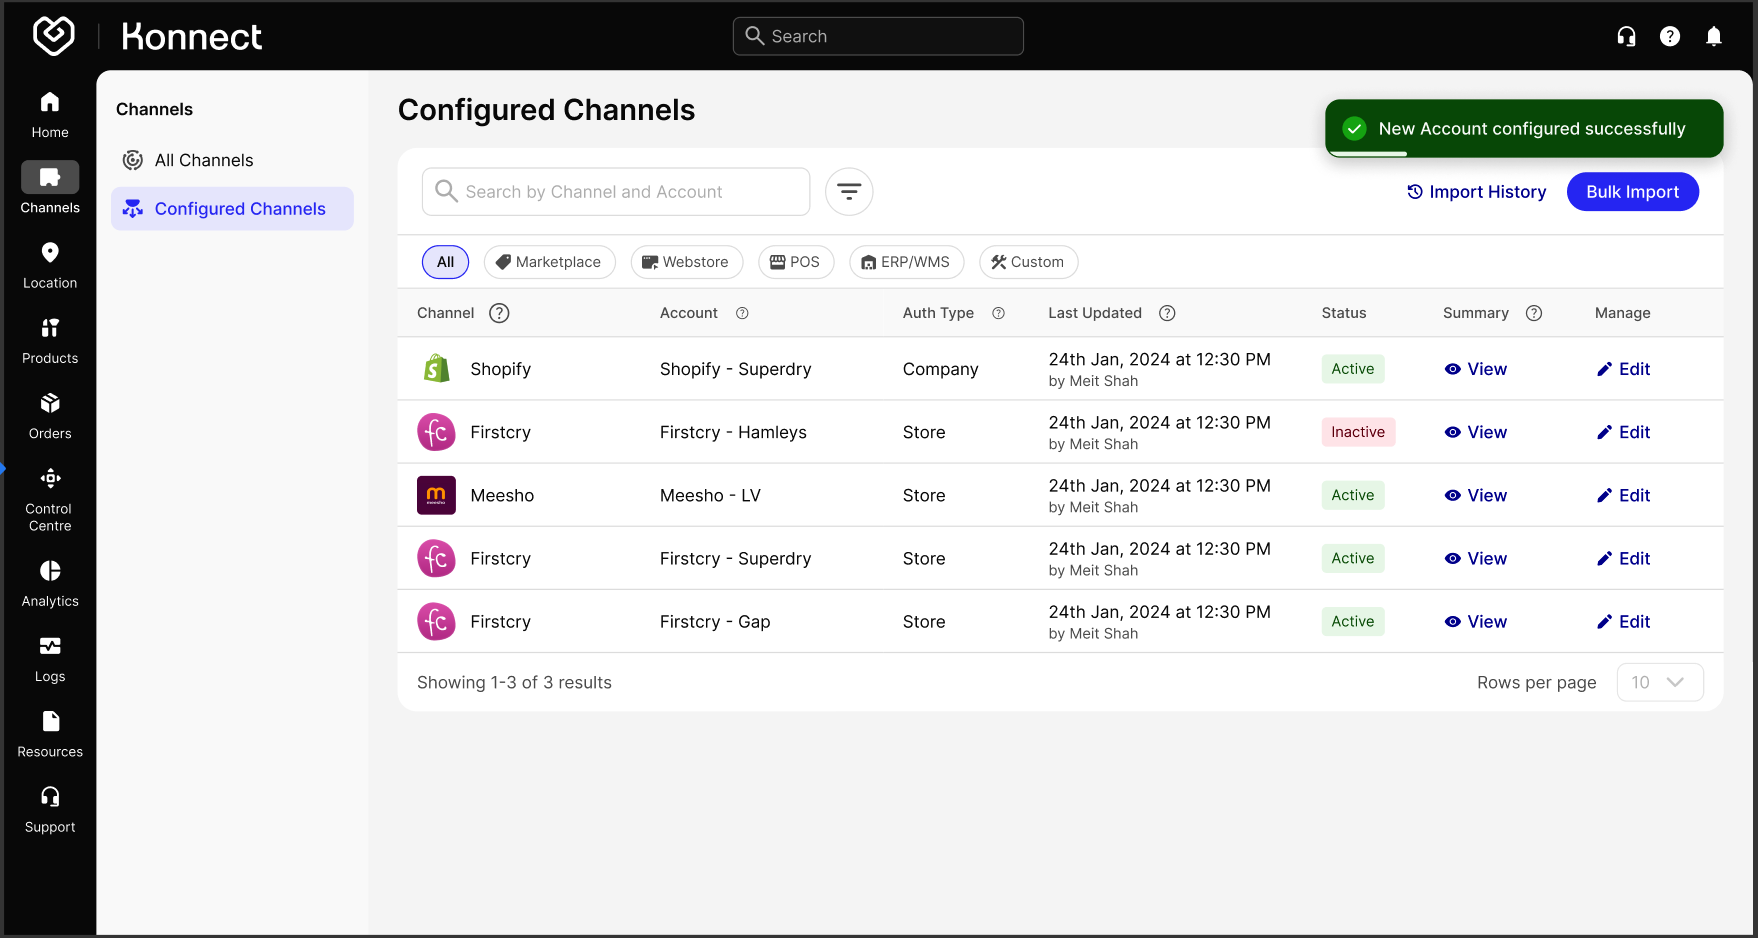
- Click Submit to finalize your channel configuration. Once submitted, the channel will appear under Configured Channels.
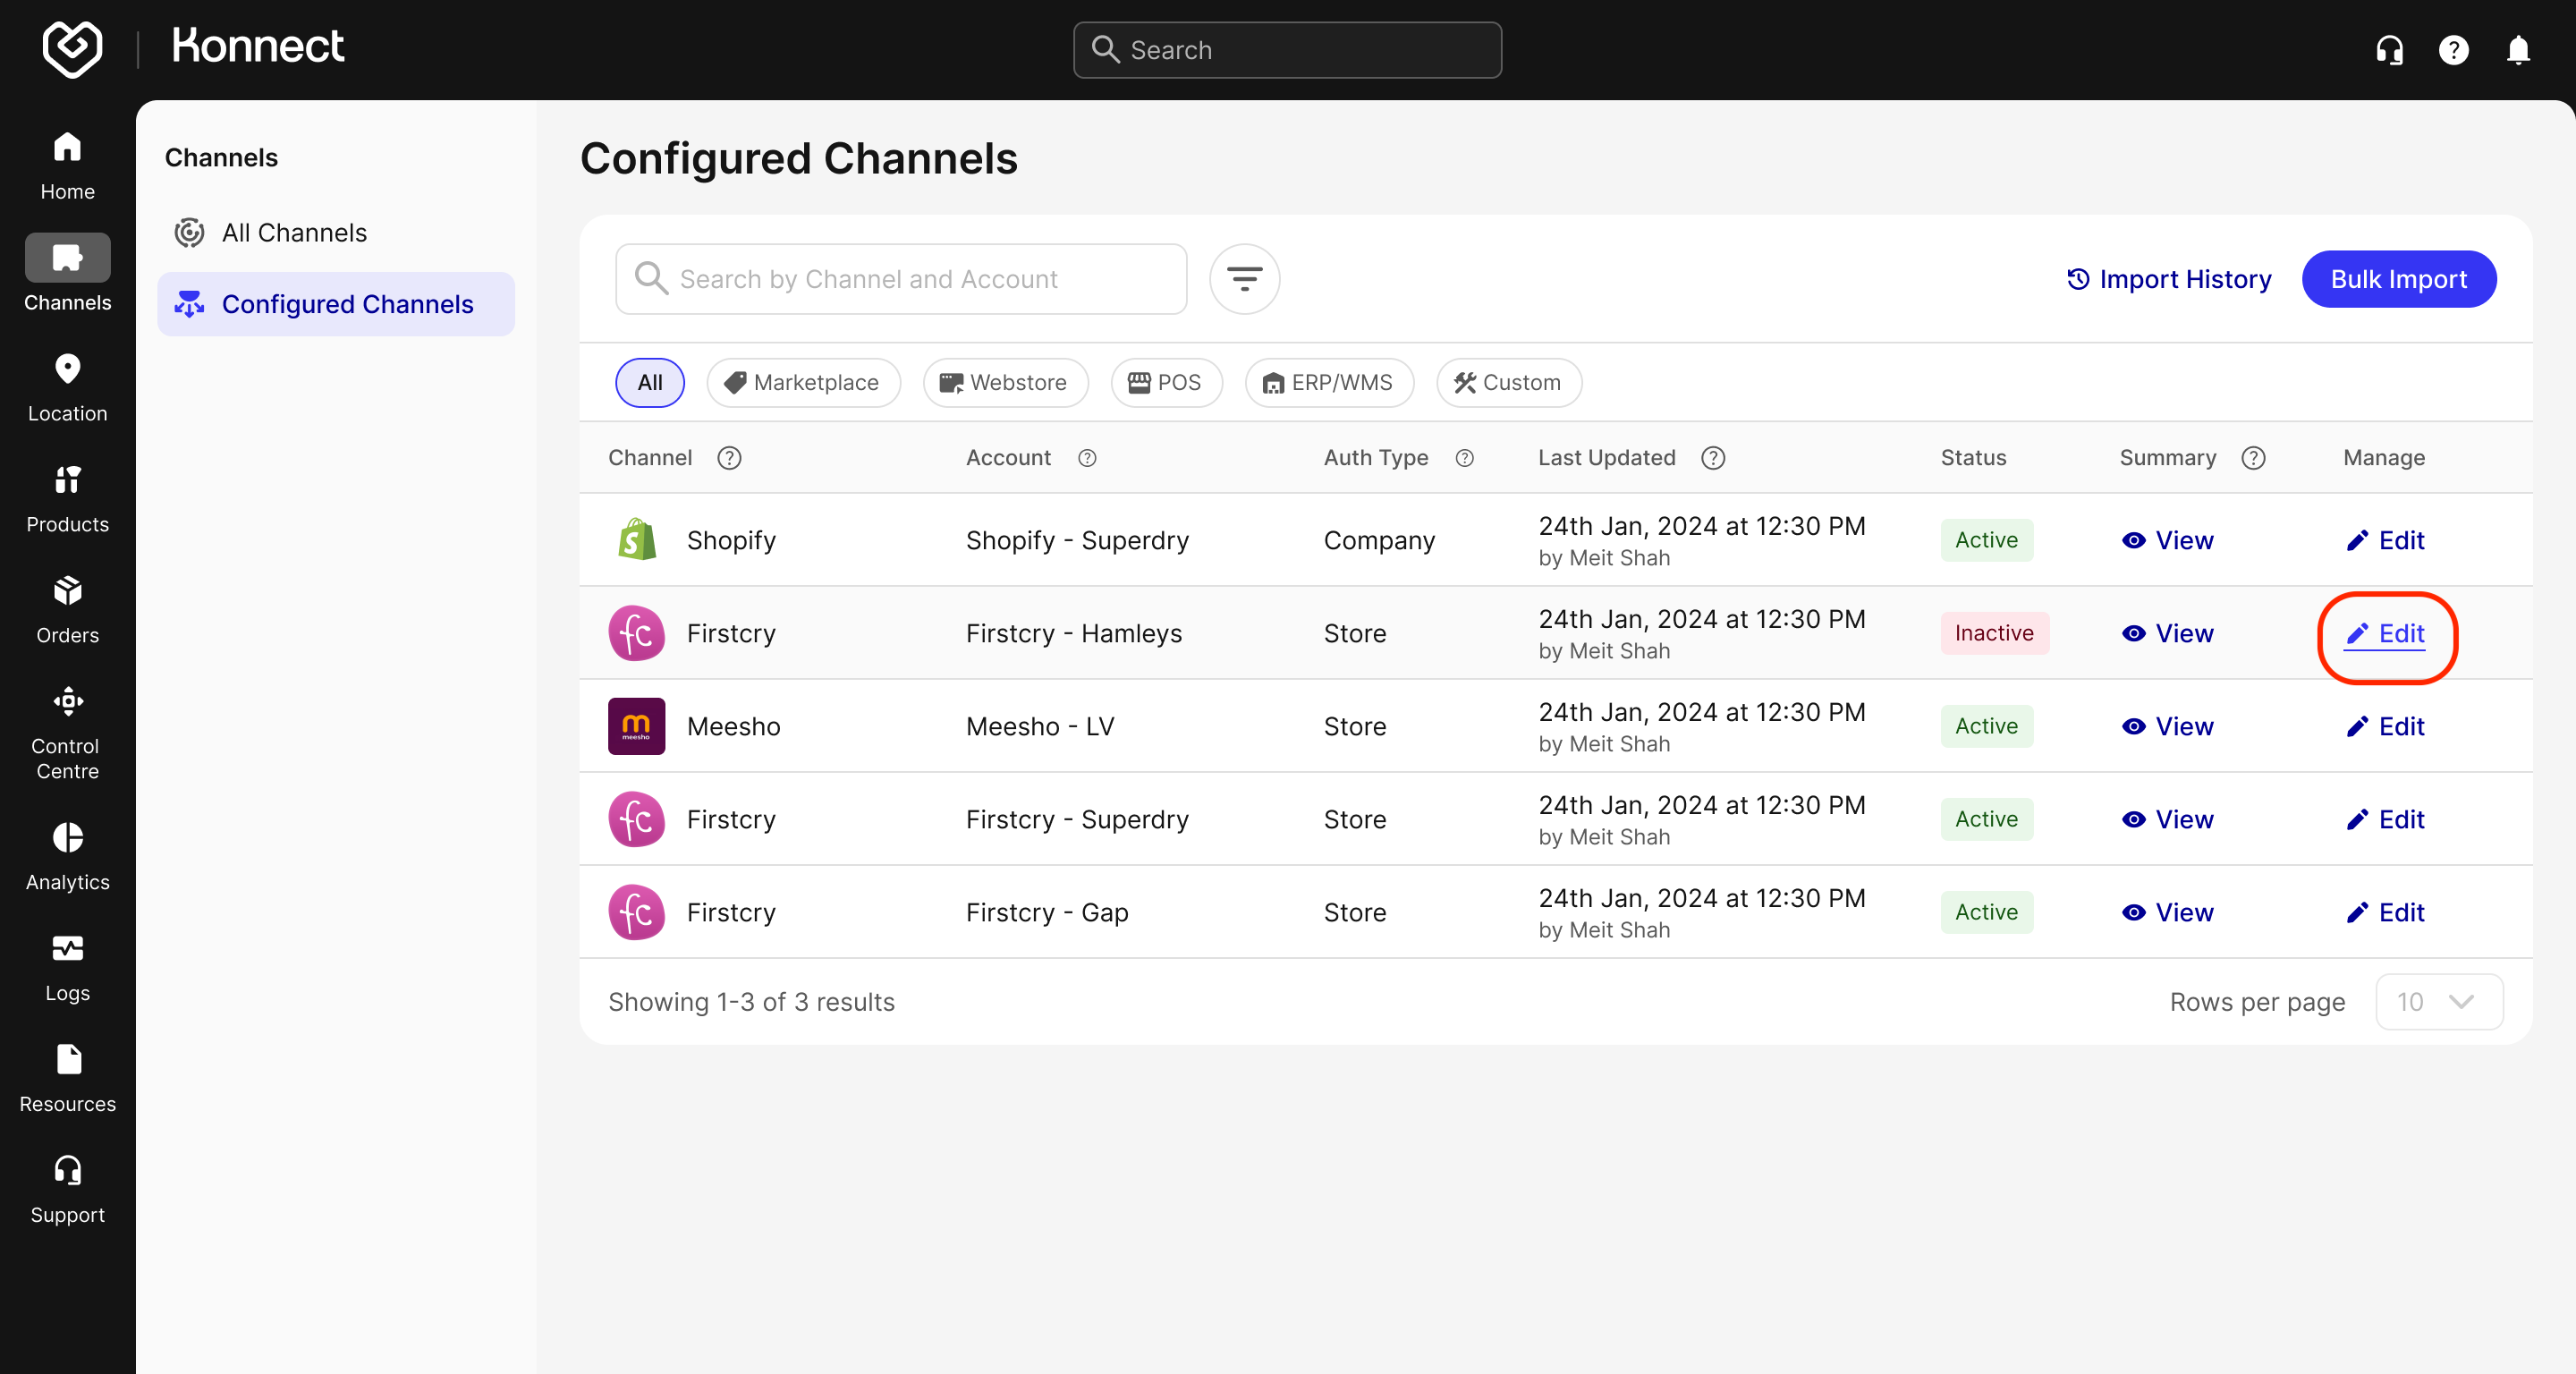
Editing a Configured Channel
If you need to modify the configuration settings or temporarily disable an account:
- Navigate to Channels → Configured Channels → Edit.
On the Account Details tab, adjust any configuration controls you originally enabled, such as:
- Order Sync (and adjust the Order Sync From date, if necessary)
- Return Sync (and update the Return Sync From date)
- Product Mapping, Inventory Sync, and Inventory Reconciliation
If you wish to inactivate the entire account, simply use the toggle at the top right of the page.
- Switch to the Locations tab to manage each location associated with the channel account. Here, you can:
- Remap Channel Identifiers: Update the external channel’s identifiers as needed.
- Edit Location Credentials: Adjust the credentials for each individual location.
- Set Buffer Stock: Configure a reserved quantity for each location to prevent overselling.
- Toggle Location Status: Change each location’s status to Active or Inactive based on your operational needs.
- Once all required changes are made, click Submit to update the configuration.