Unified Inventory Logs
The Unified Inventory Logs in Konnect provide a comprehensive audit trail for every inventory update made to (marketplaces & webstores) or from (ERP/WMS/POS systems) the configured channel. These logs offer clear visibility into the flow of inventory data between Konnect and your connected channels, making it easier to verify updates and troubleshoot issues.
Use Cases
Verification:
Confirm that channels are receiving the correct stock updates. For example, if a channel is displaying an incorrect stock level, use the logs to determine if Konnect successfully pushed the right quantity.Troubleshooting:
Investigate failed or partial inventory pushes by reviewing detailed logs to pinpoint issues with API calls or data mismatches.
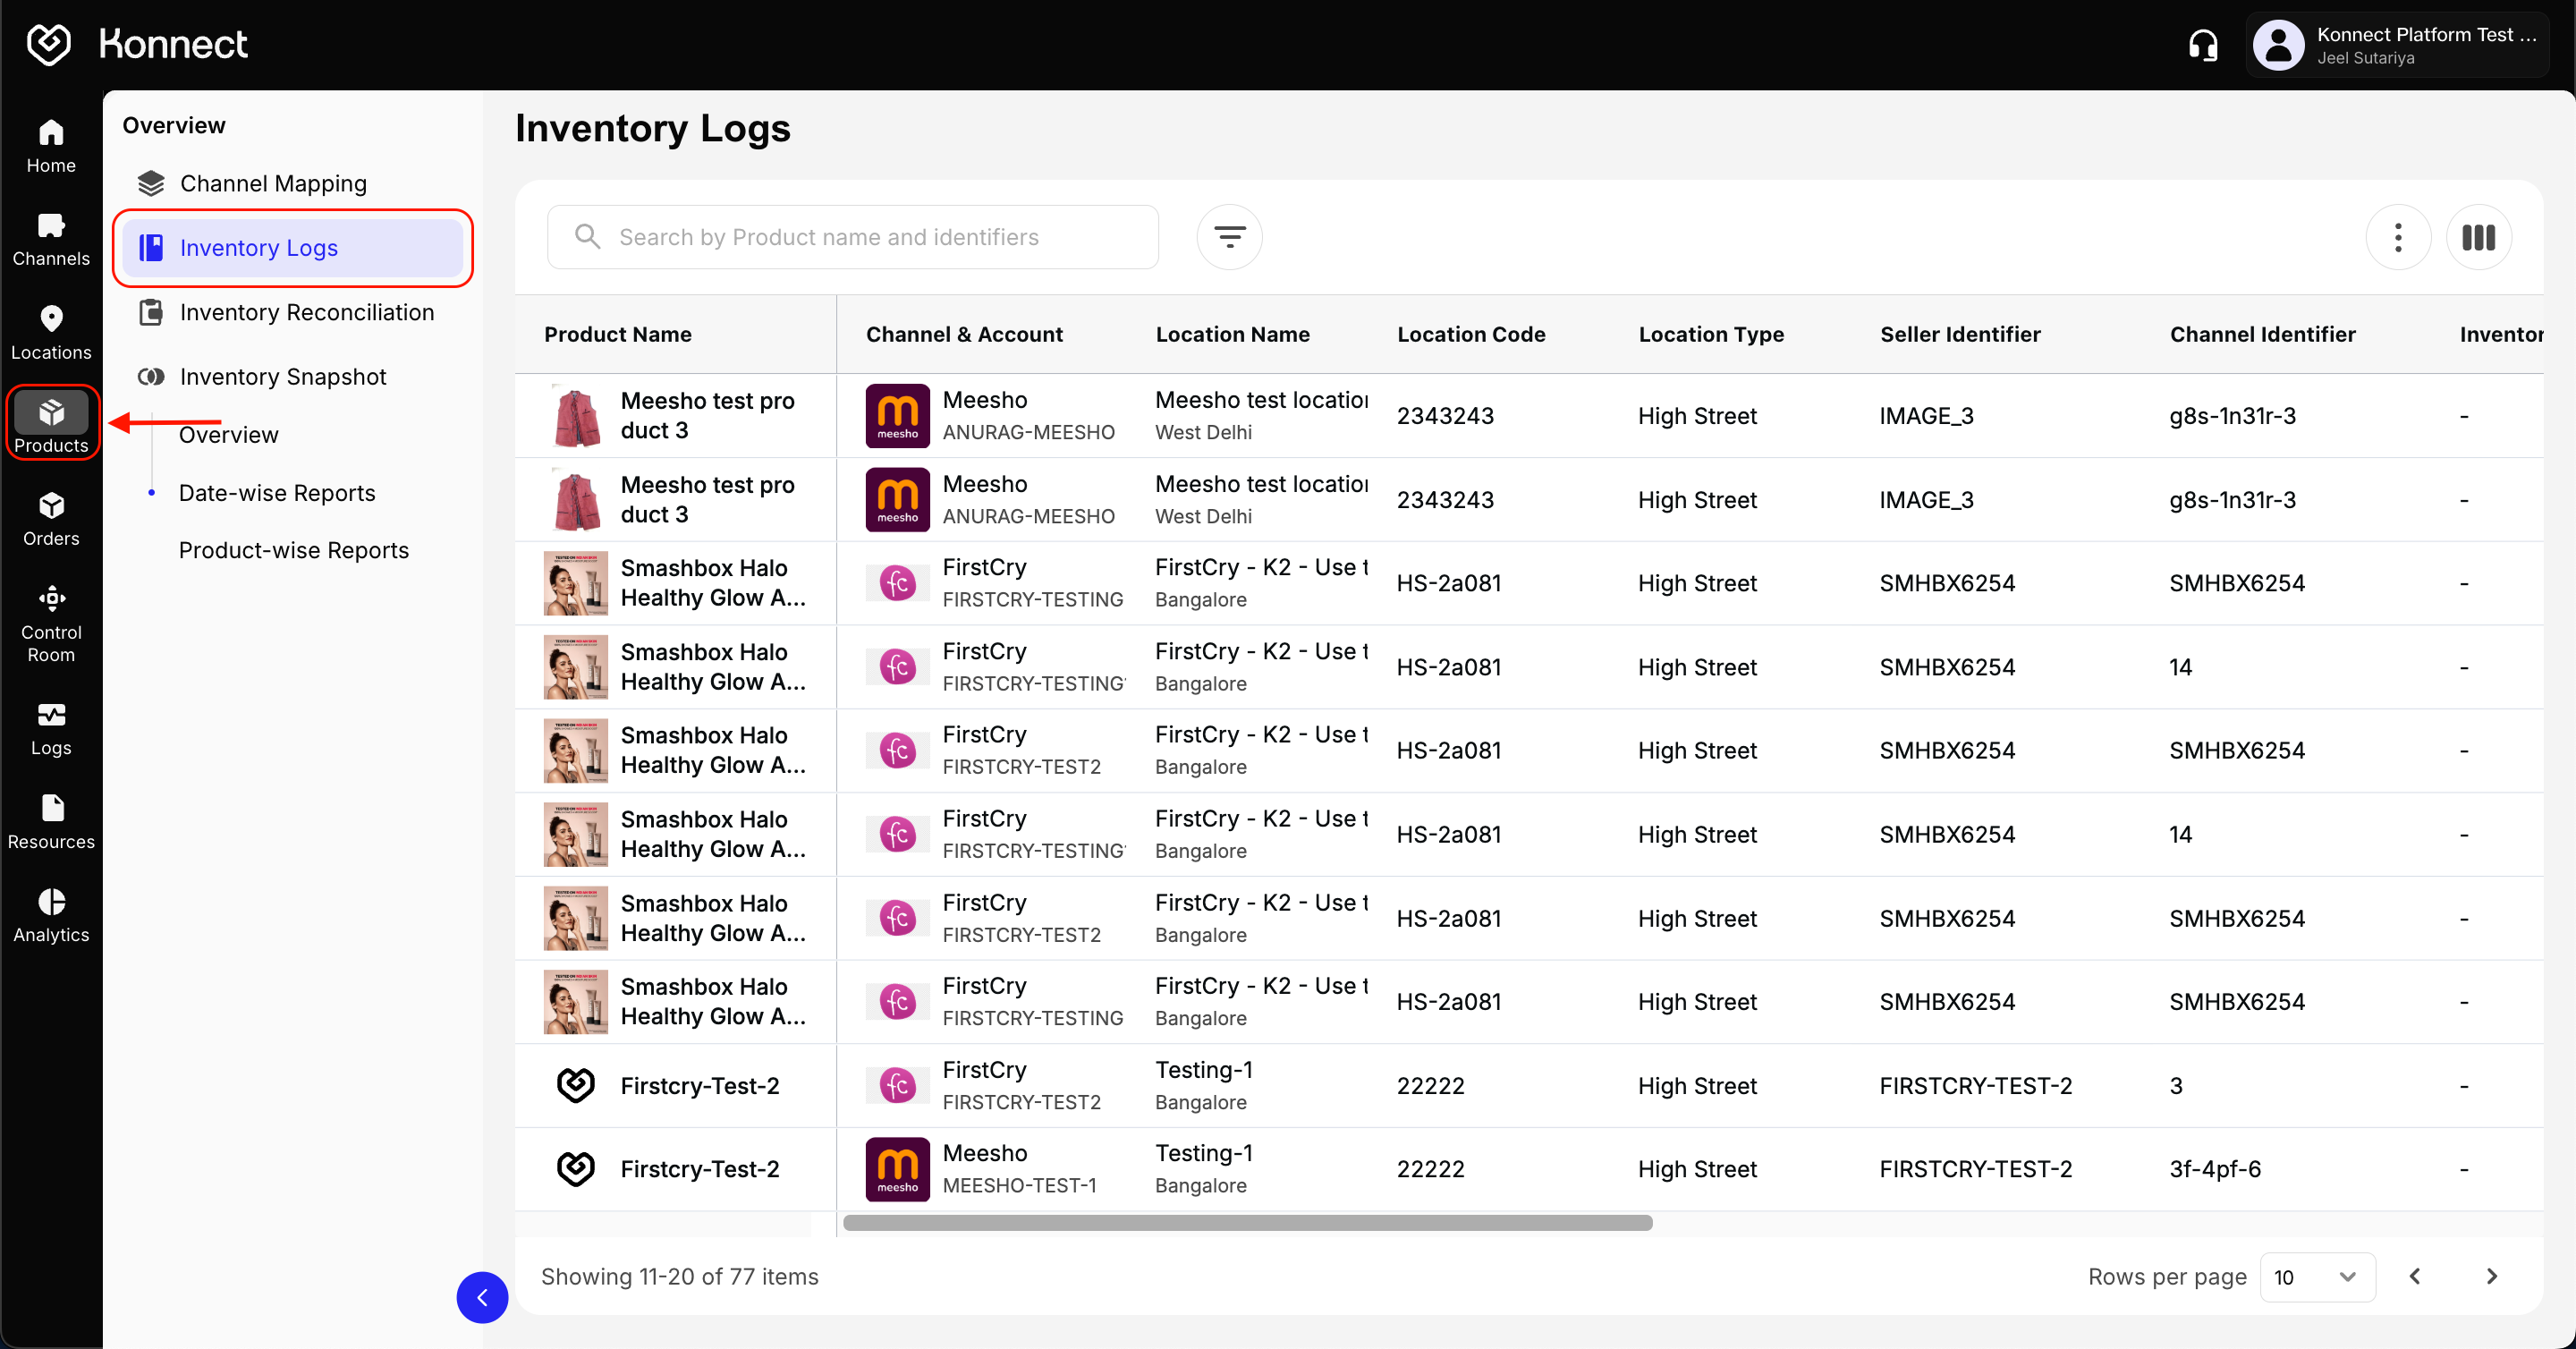
Accessing Inventory Logs
- Log in to your Konnect Seller Panel.
- Navigate to Products in the left-hand menu.
- Click on Inventory Logs.
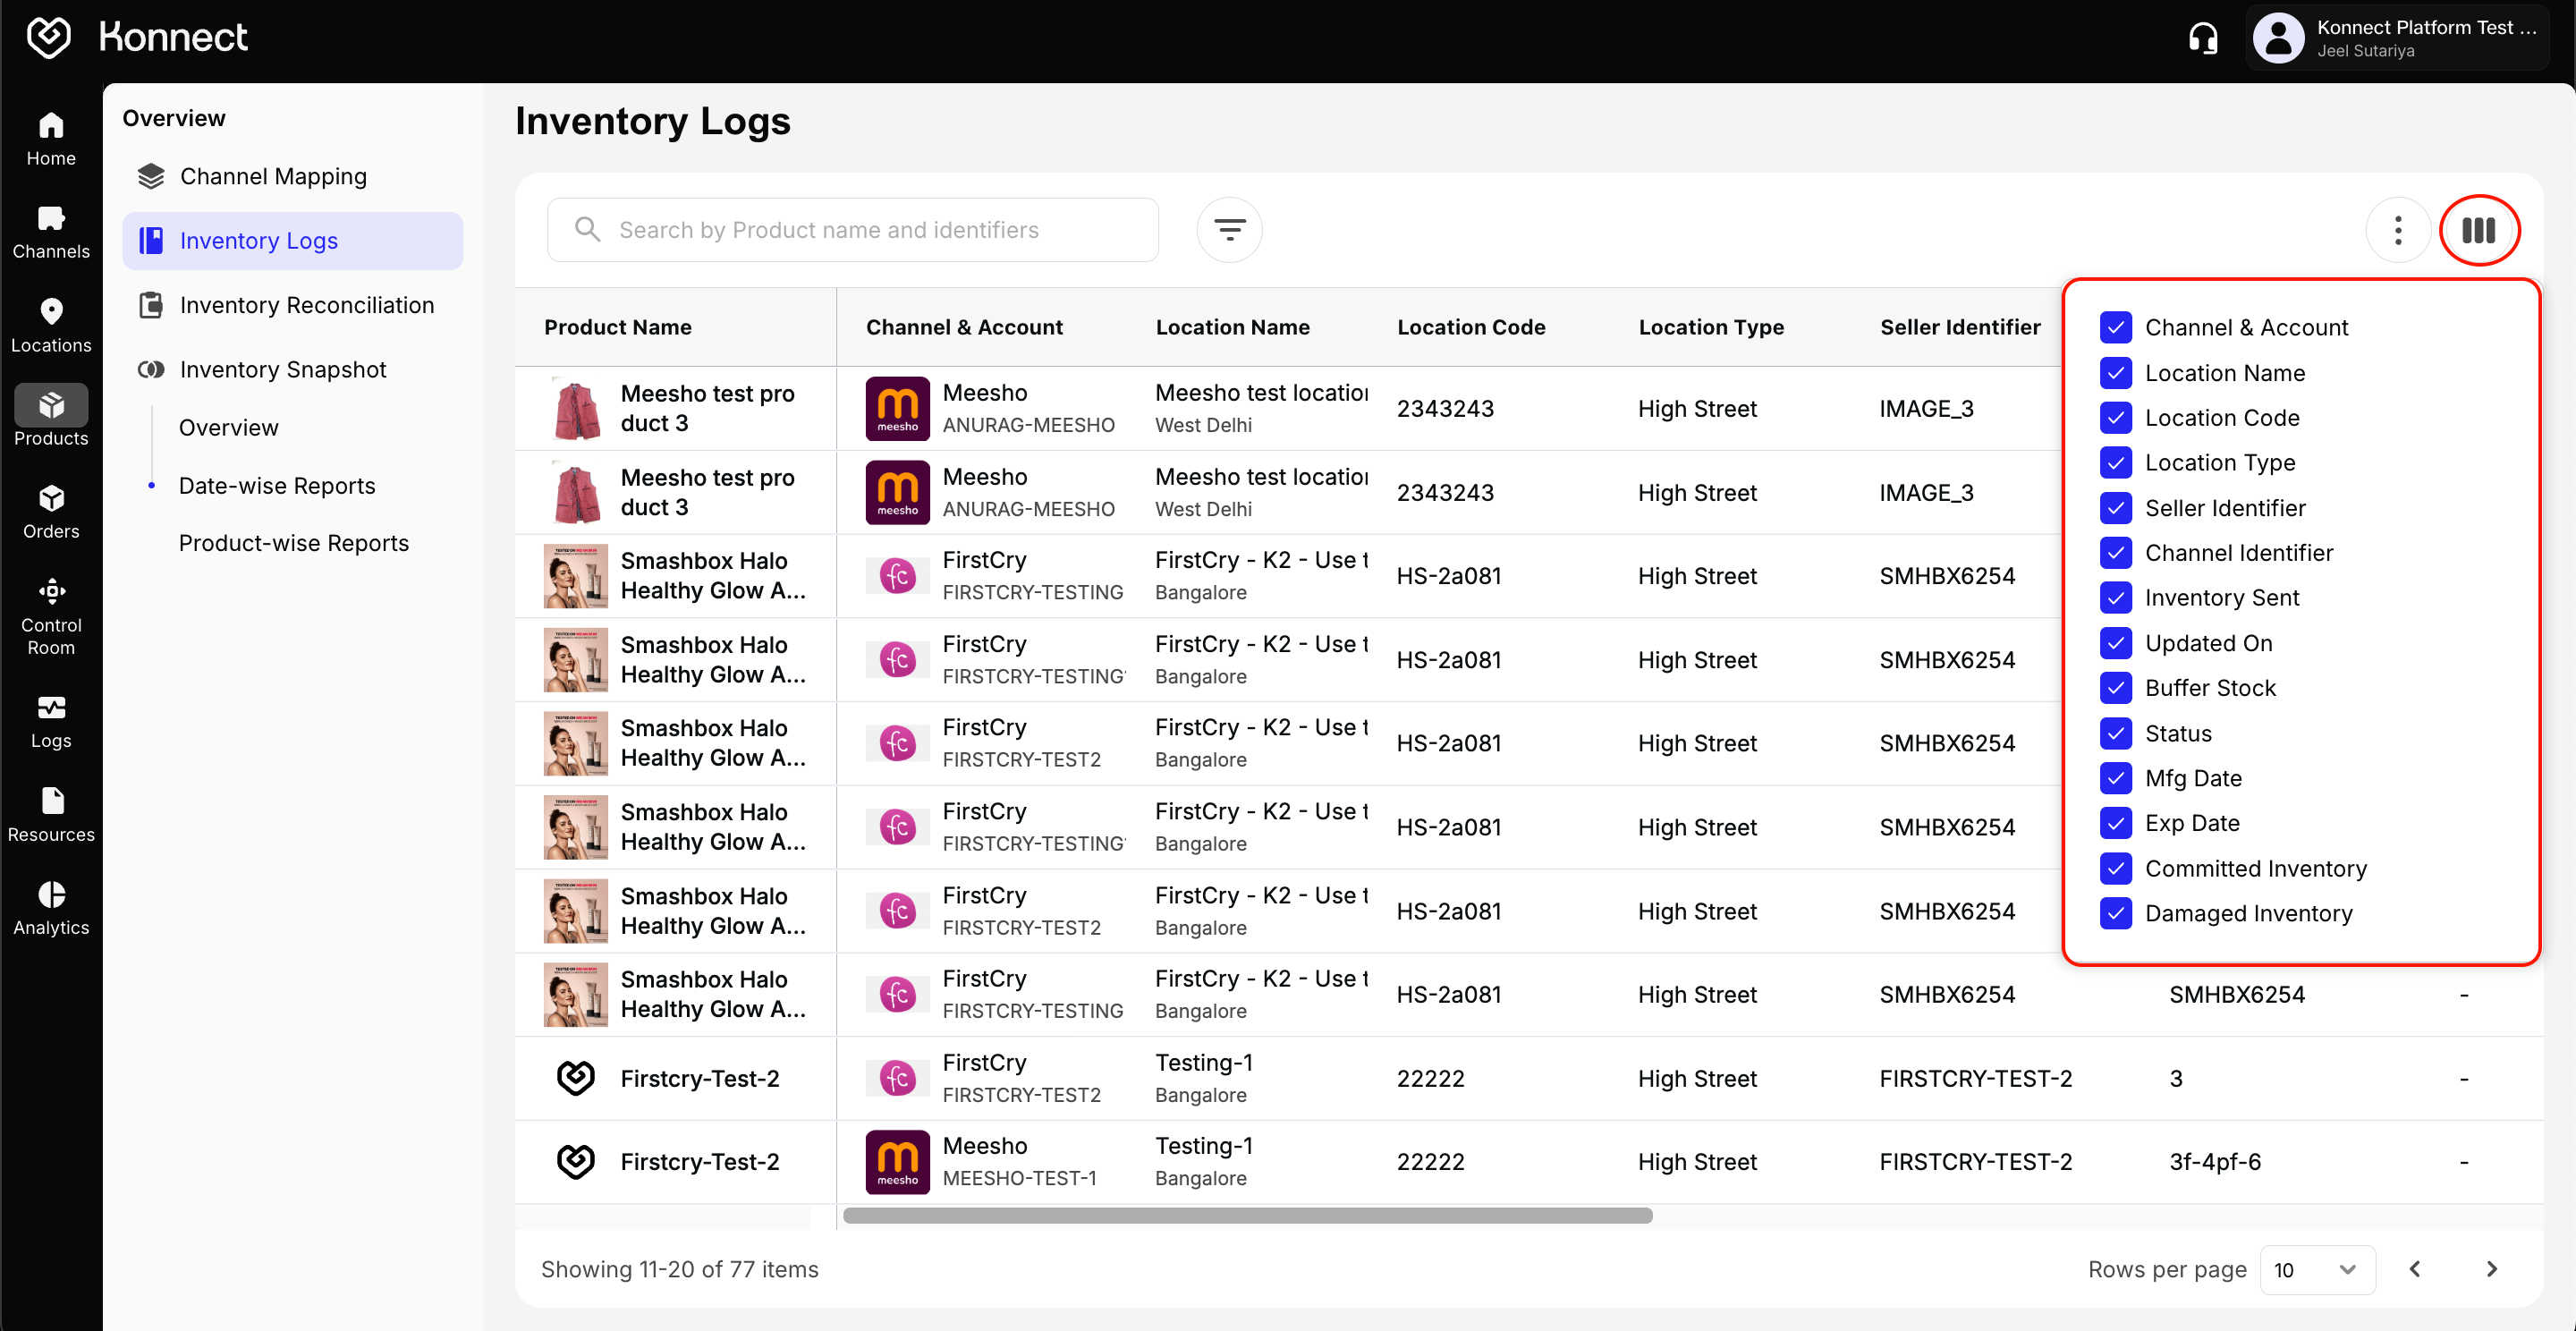
Column Selector
Once on the Inventory Logs page, use the column selector (at the top-right corner) to customize your view. You can show or hide columns such as:
- Product Name: Displays the product’s name as configured in Fynd Commerce.
- Channel & Account: Identifies the channel (e.g., Amazon) and the specific account (e.g., Amazon-Mumbai) where the inventory update is made.
- Location Name: The store or warehouse name holding the product inventory.
- Location Code: A unique code assigned to each location (e.g., WH01, STR002).
- Location Type: Indicates whether the location is a warehouse, retail store, mall, etc.
- Seller Identifier: The core SKU or GTIN code used in Fynd Commerce (e.g., EAN, UPC).
- Channel Identifier: The product code recognized by the external channel.
- Inventory Sent: The exact quantity pushed from Konnect to the channel.
- Updated On: The timestamp of the last successful API call or update event.
- Buffer Stock: The reserve quantity held back during inventory sync—calculated in the following order:
- Product Level: If a product-level buffer is set, that value is applied.
- Location Level: If no product-level buffer exists, the location-level buffer is used.
- Account Level: If neither is set, the account-level buffer is applied.
- Committed Inventory: The amount of inventory locked for ongoing or completed orders.
- Damaged Inventory: Units marked as damaged or otherwise unsellable.
- Status: Indicates whether the update succeeded (Success) or failed (Failed).
- Mfg Date: The manufacturing date for the batch of products (if applicable).
- Exp Date: The expiry date for perishable or time-bound products (if applicable).
You can hover over the column headers to see tooltips (where available) or drag them horizontally to reorder the table view.
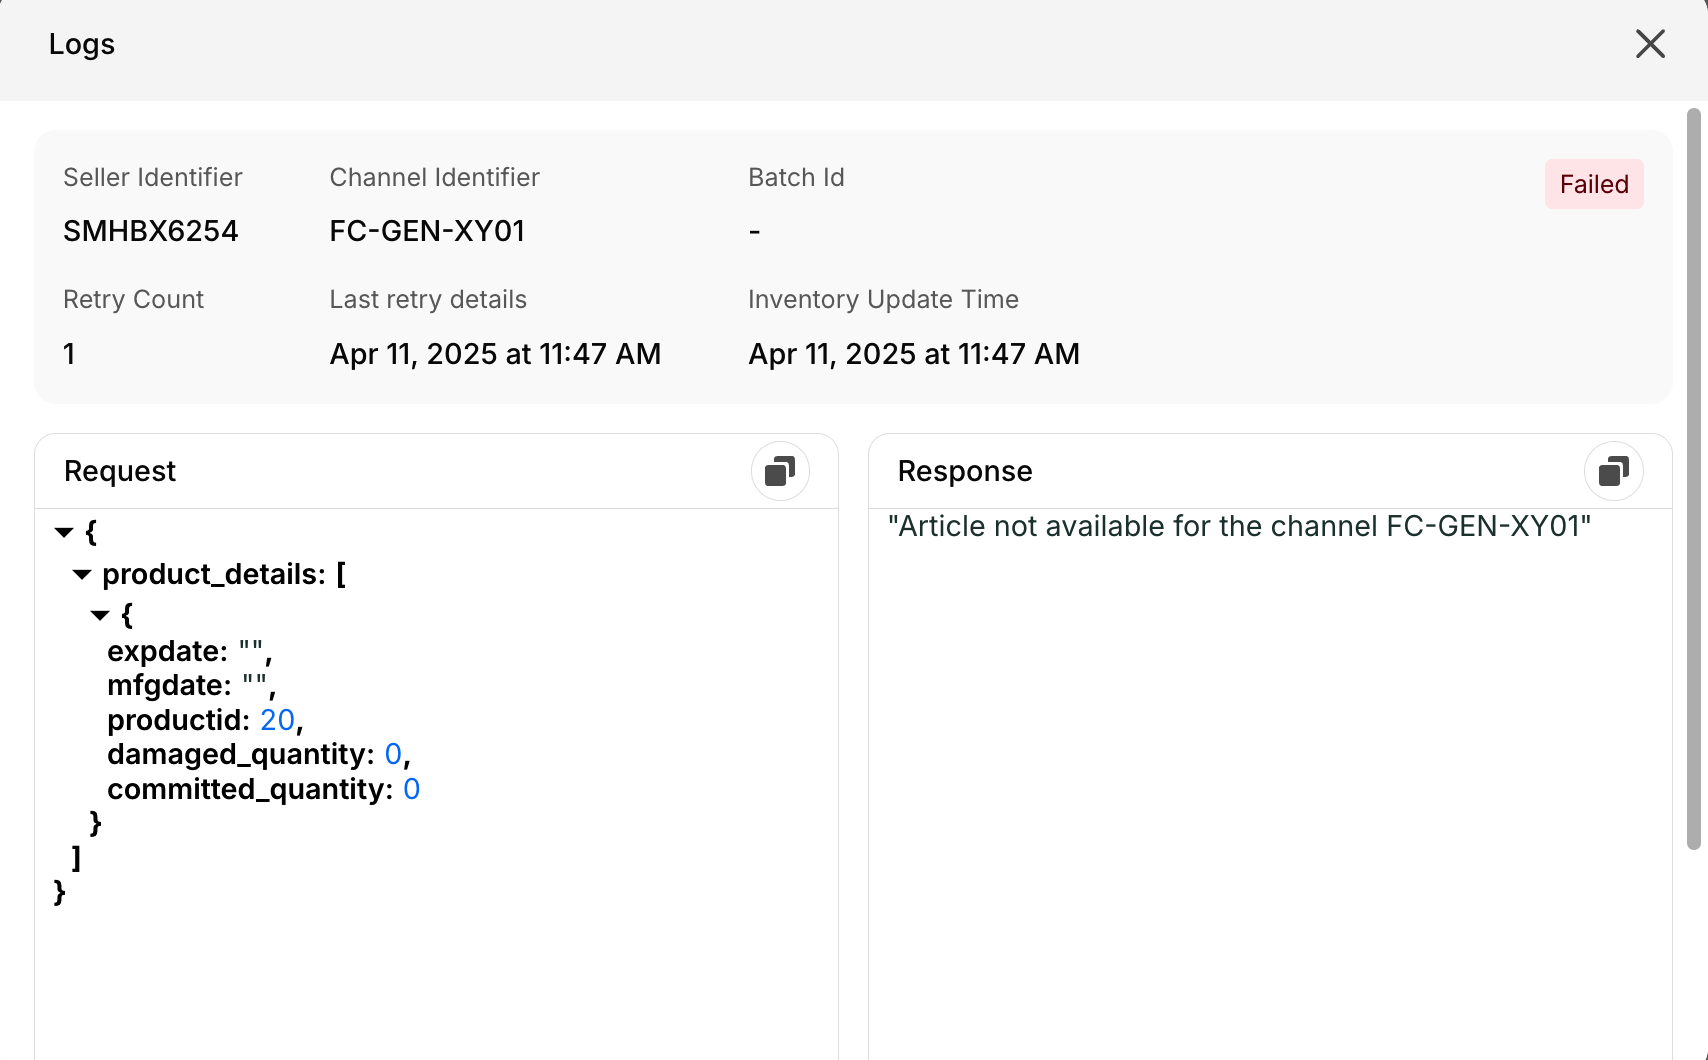
Detailed Log View
When you click on a Status entry in any row, a detailed view opens displaying:
- Batch ID: Unique identifier for the inventory update API request batch.
- Last Retry: Timestamp of the most recent automatic retry (Konnect automatically retries failed requests a limited number of times as per admin configuration).
- Retry Count: Number of times the API request has been retried.
- Last Retry Details: Timestamp and additional context about the last retry attempt.
- Inventory Update Time: Timestamp when the inventory update was processed.
- API Request & Response: Full details of the API call, including the payload sent and response received, presented in a JSON viewer.
Export Function
The export function allows you to download the current view of your Inventory Logs as a .csv or .xlsx file for further analysis or record-keeping.
Steps to Export
Click on Export Data: Navigate to Products → Inventory Logs and select the Export Data option from the Kebab (⋮) menu.
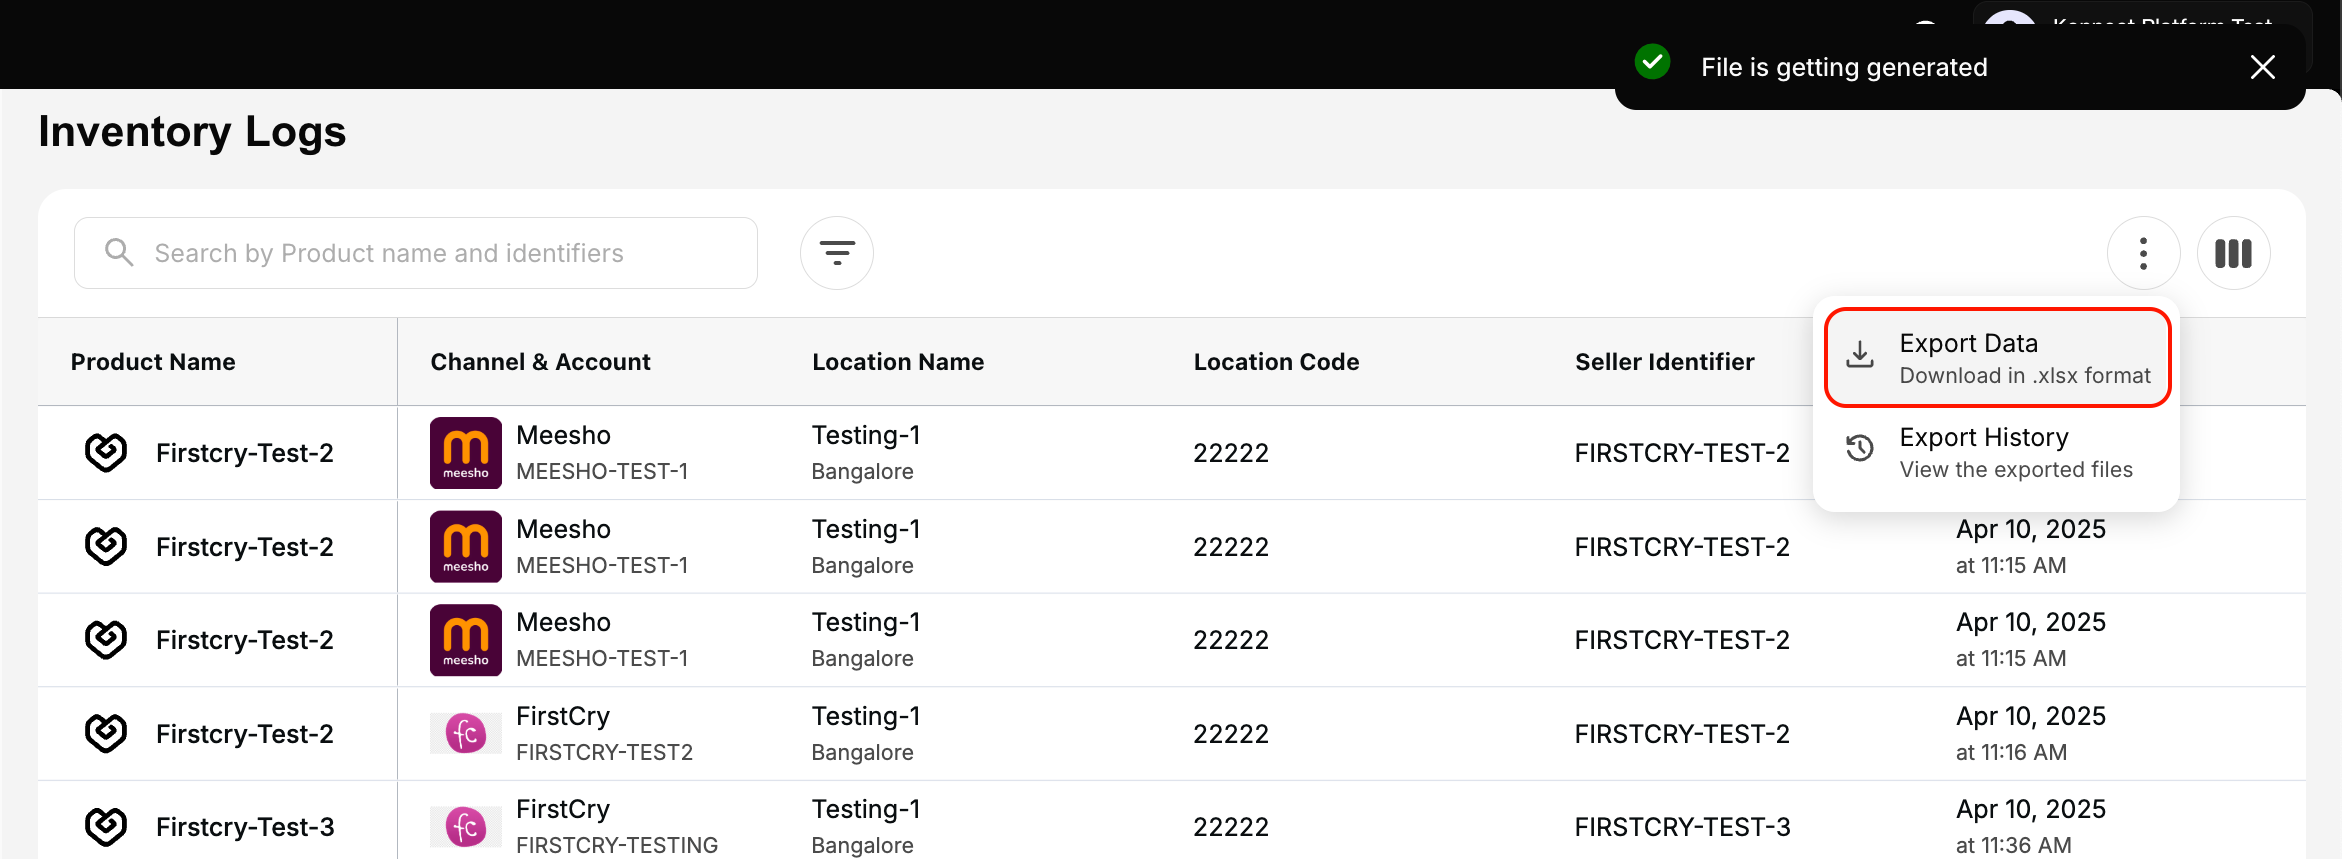
Figure 4: Accessing Inventory Logs Export Select Columns & Apply Filters: Adjust the column selector and apply any filters (e.g., specific date ranges, status types) to customize your view.
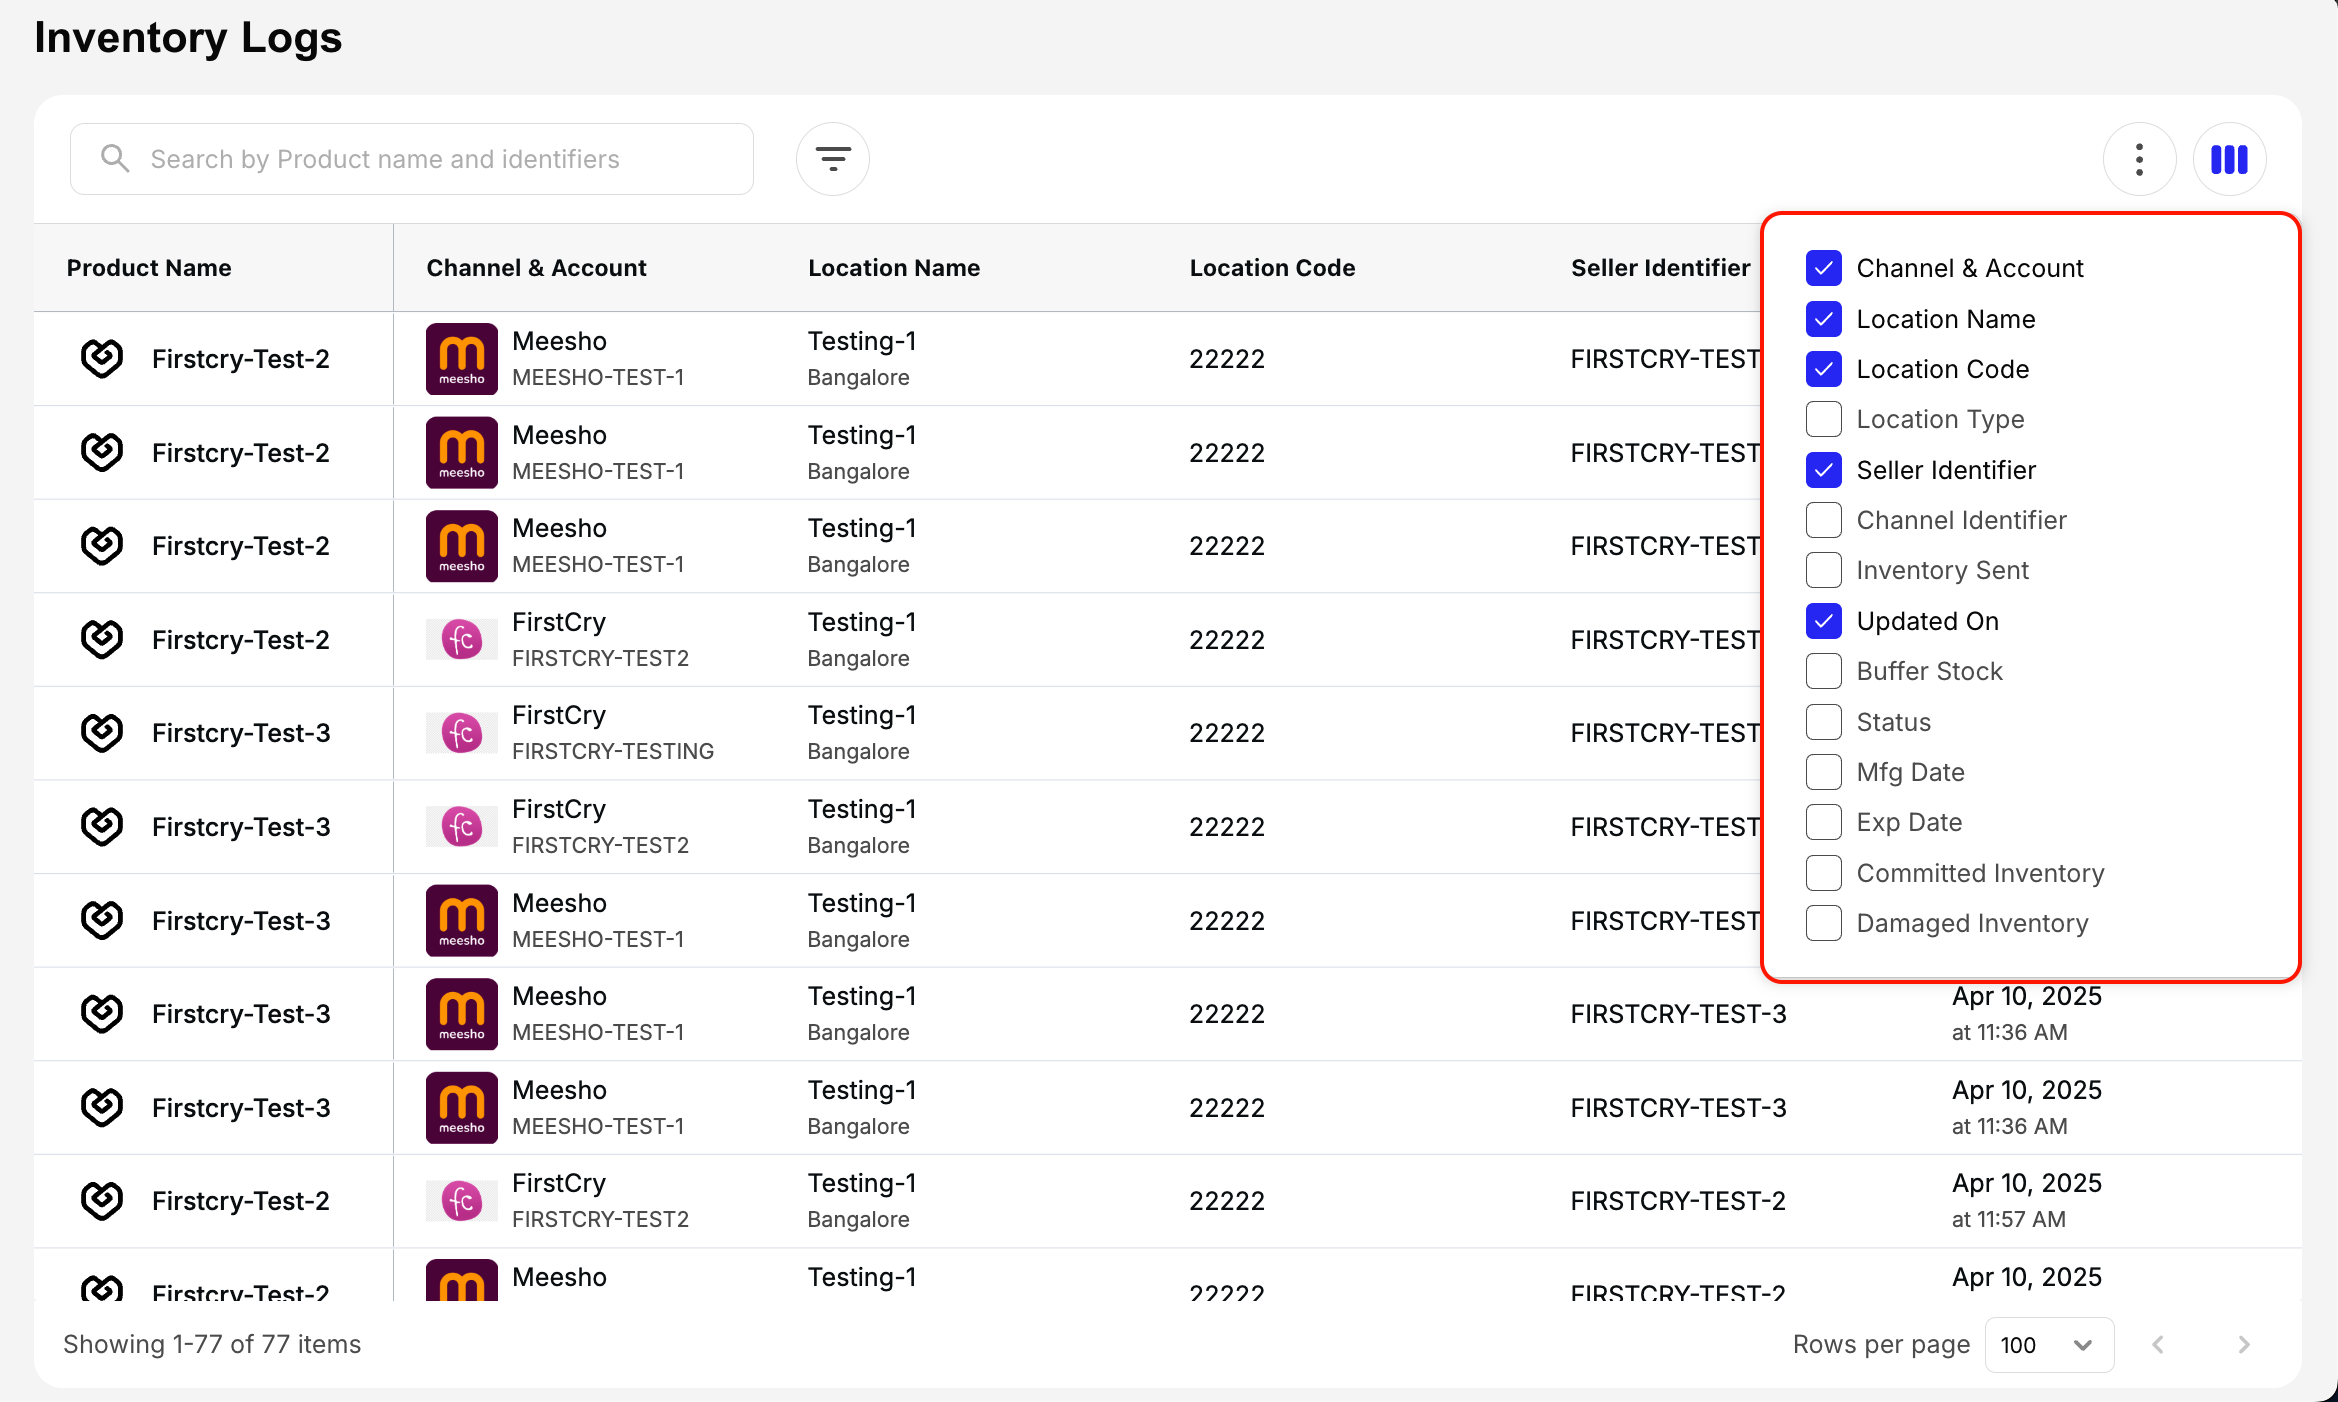
Figure 5: Logs Column View File Generation: Konnect will generate a file containing all the data visible in your current view.
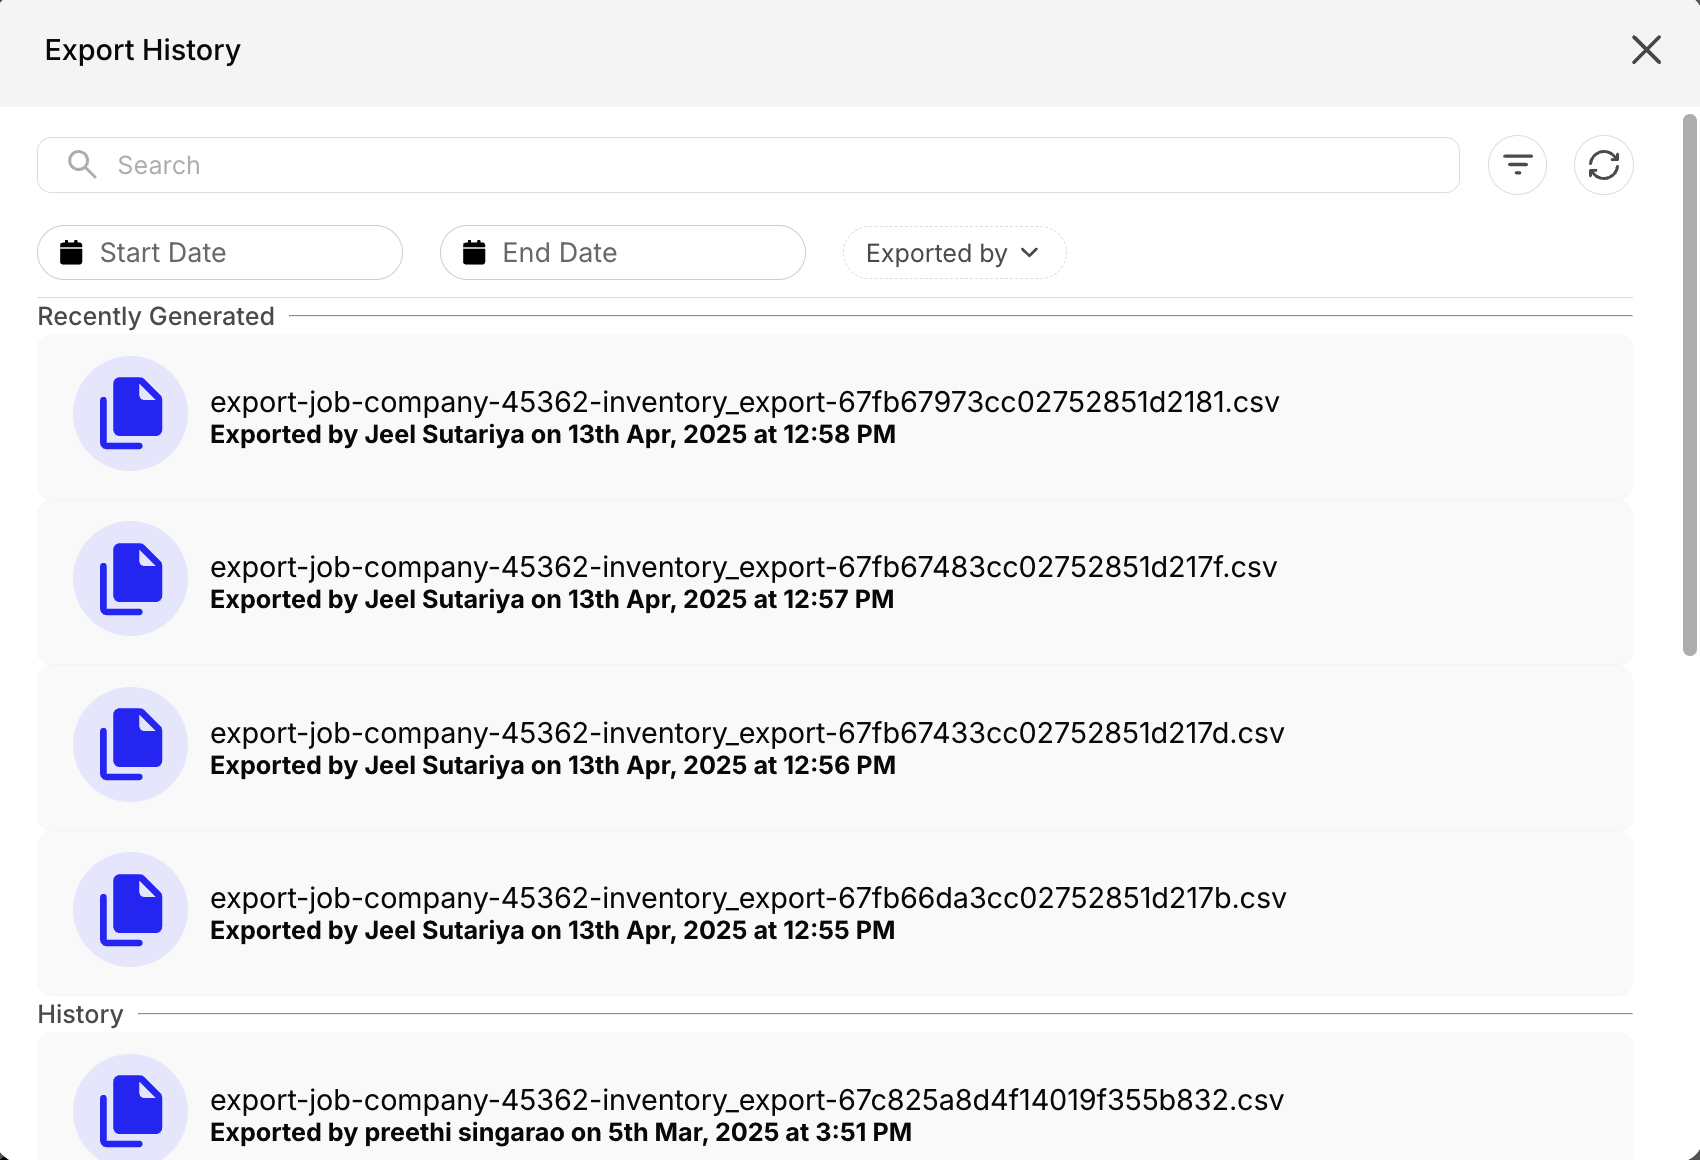
Figure 6: Export Data Selection Tracking Export Status:
- After initiating the export, monitor its progress in the Export History.
- Use filters (by date, user, file name) to locate your export once it is marked as Success or Failed.
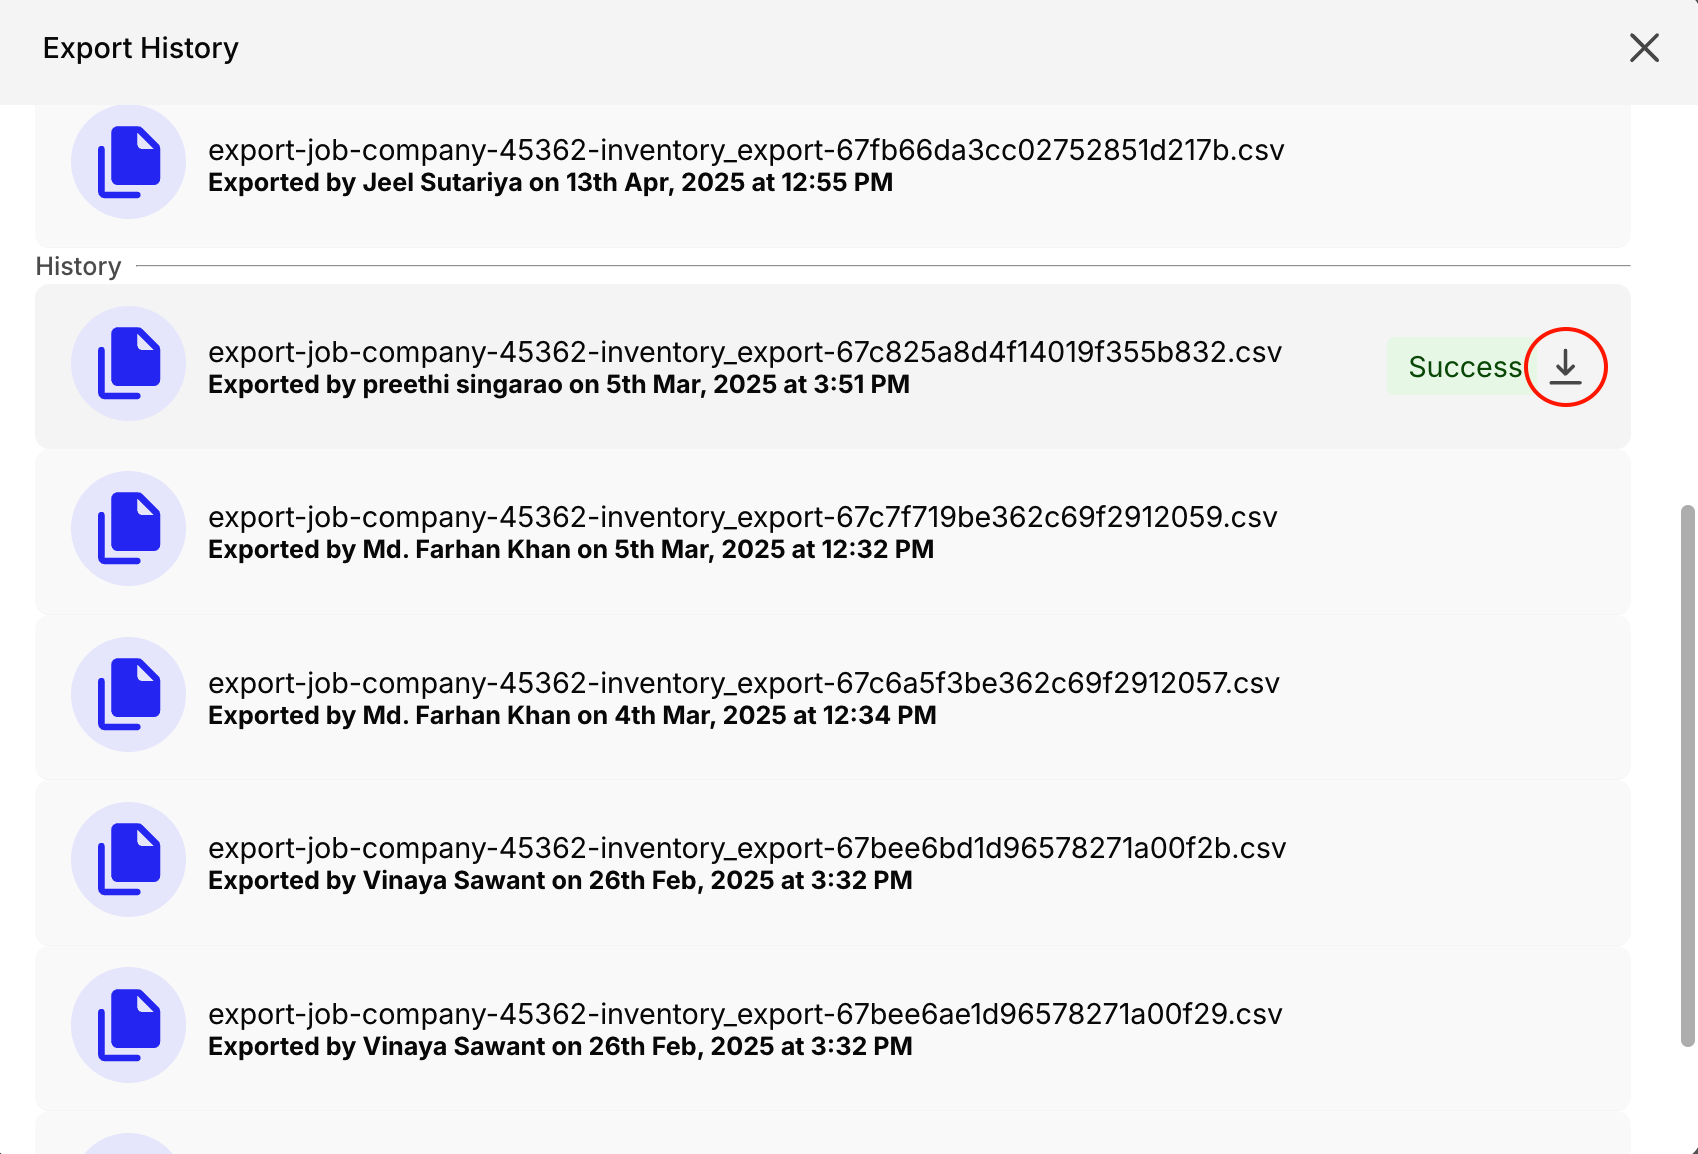
- Download the File: When the export file is completed and marked as successful, download it directly from the Export History section.
Note: The exported file will mirror the exact data displayed on your Inventory Logs panel, including any applied filters or column settings. Ensure your view is configured correctly before initiating the export.
Regularly review your logs and set up automated exports as part of your audit processes to quickly detect and resolve any discrepancies in your inventory data.